Today is a colleague’s birthday and he was asked what he wanted to do for his birthday & he (like most men) said “dunno”… For whatever reason he was watching the Moulin Rouge ‘Lady Marmalade’ cover version & he said “I’d love it if I could have a party where all the girls dressed like THAT!” So what could I do? I decided to make a Moulin Rouge-themed card!
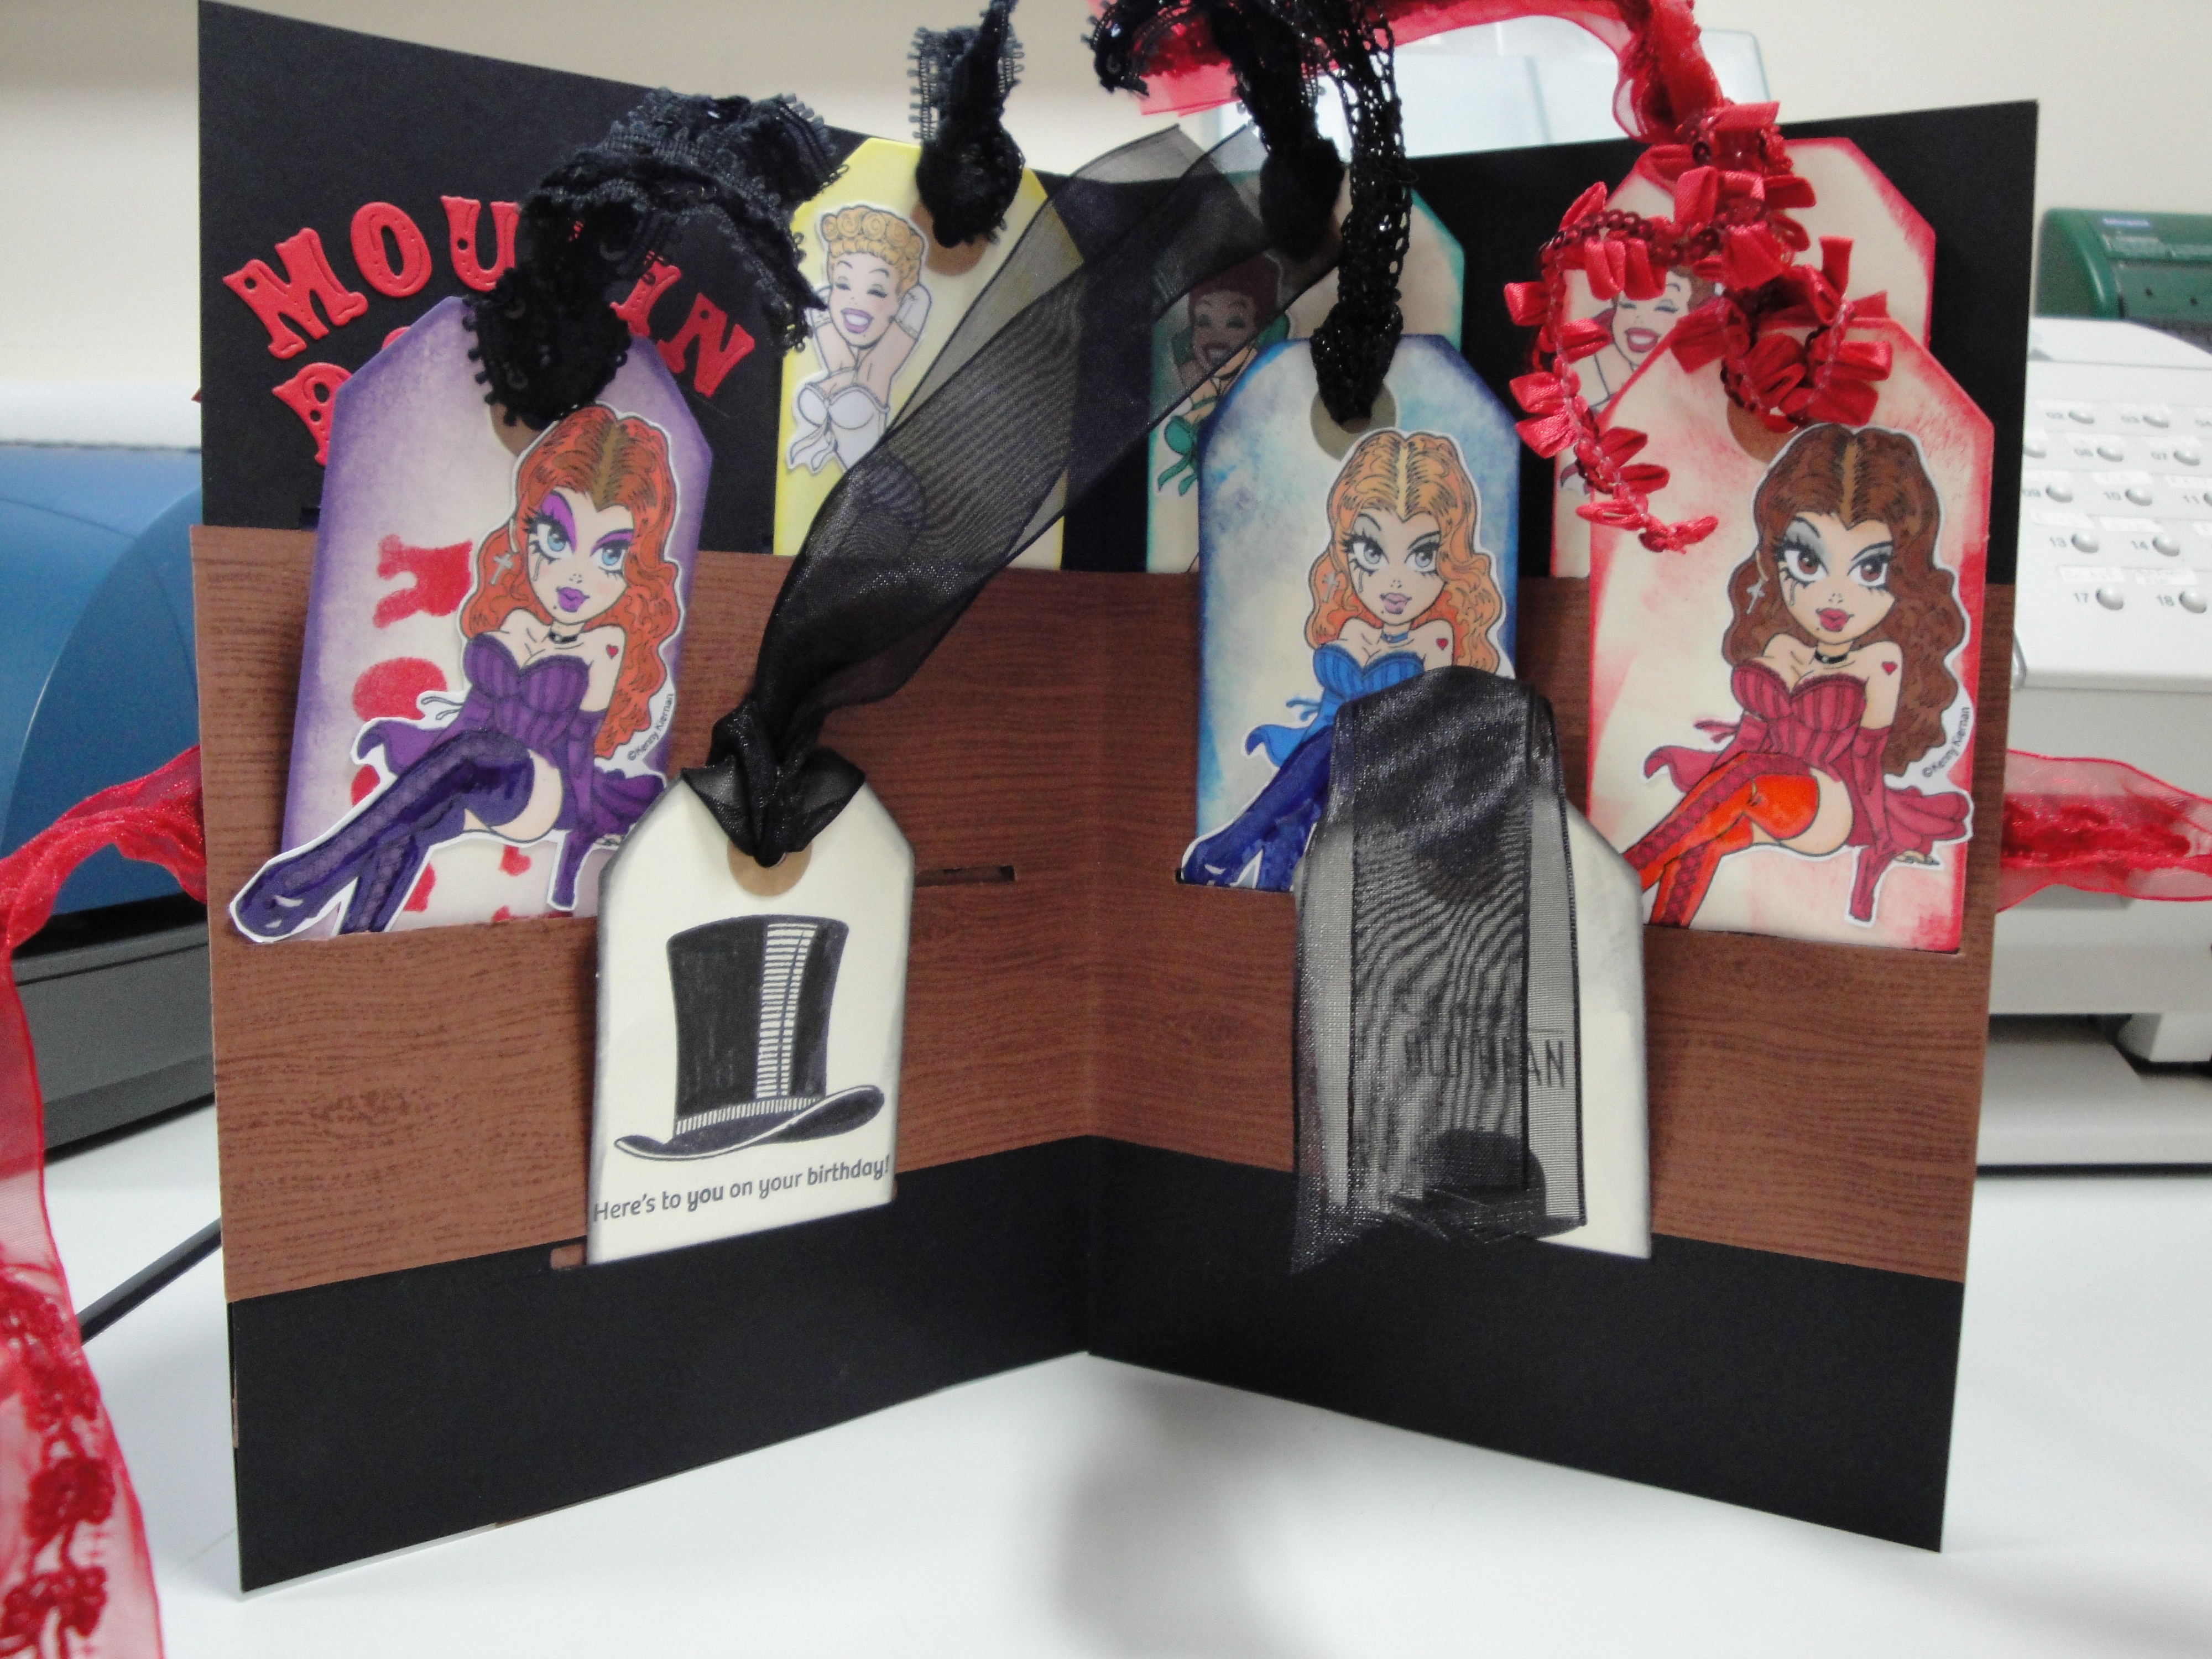
I had a think & looked at a few images of the Moulin Rouge & decided the front of the card HAD to have a red windmill on it… But then where should all the dancing girls go? I tried thinking of different layouts for the front of the card, but I either needed to make the card enormous or change my idea. Then inspiration hit – I used to love those ‘build it yourself’ cardboard theatres where the characters were made of cardboard & on the base they were either attached to sticks or had an interlocking cross base so they could stand upright. An example is available from the Victoria and Albert museum here. So I decided that I would put a ‘stage’ inside the card and have the dancing girls ‘on the stage’ and a few ‘gentlemen’ in the audience.
First off I made a red windmill by cutting a rectangle of red card and scoring 0.5 cm in from the edge along the two long edges, creating tabs. Photographs of the Moulin Rouge have little windows in the windmill so I cut out several rectangular ‘windows’ from metallic bronze paper and attached them to the top half of the body of the windmill with roll on glue (AKA Snail), using a ruller to line them all up. Next I cut the largest of the scalloped circles in my Spellbinders die set out of red card, cut between two scallops towards the centre and folded it over until I had a cone to make the roof of the windmill. I cut two strips of red card and scored from corner to corner to create the sails and cut long the lines until almost at the centre, then I cut towards the facing diagonal so there was enough card in the middle to put a brad through so the sails could be attached to the front of the windmill. I used a smaller scalloped circle die to cut out two half circles to re-inforce the body of the windmill, using double sided tape on the bent over scallops so they would stick to the inside of the windmill creating a circular shaped windmill. I attached all the windmill bits and pieces to a piece of A5 black card.
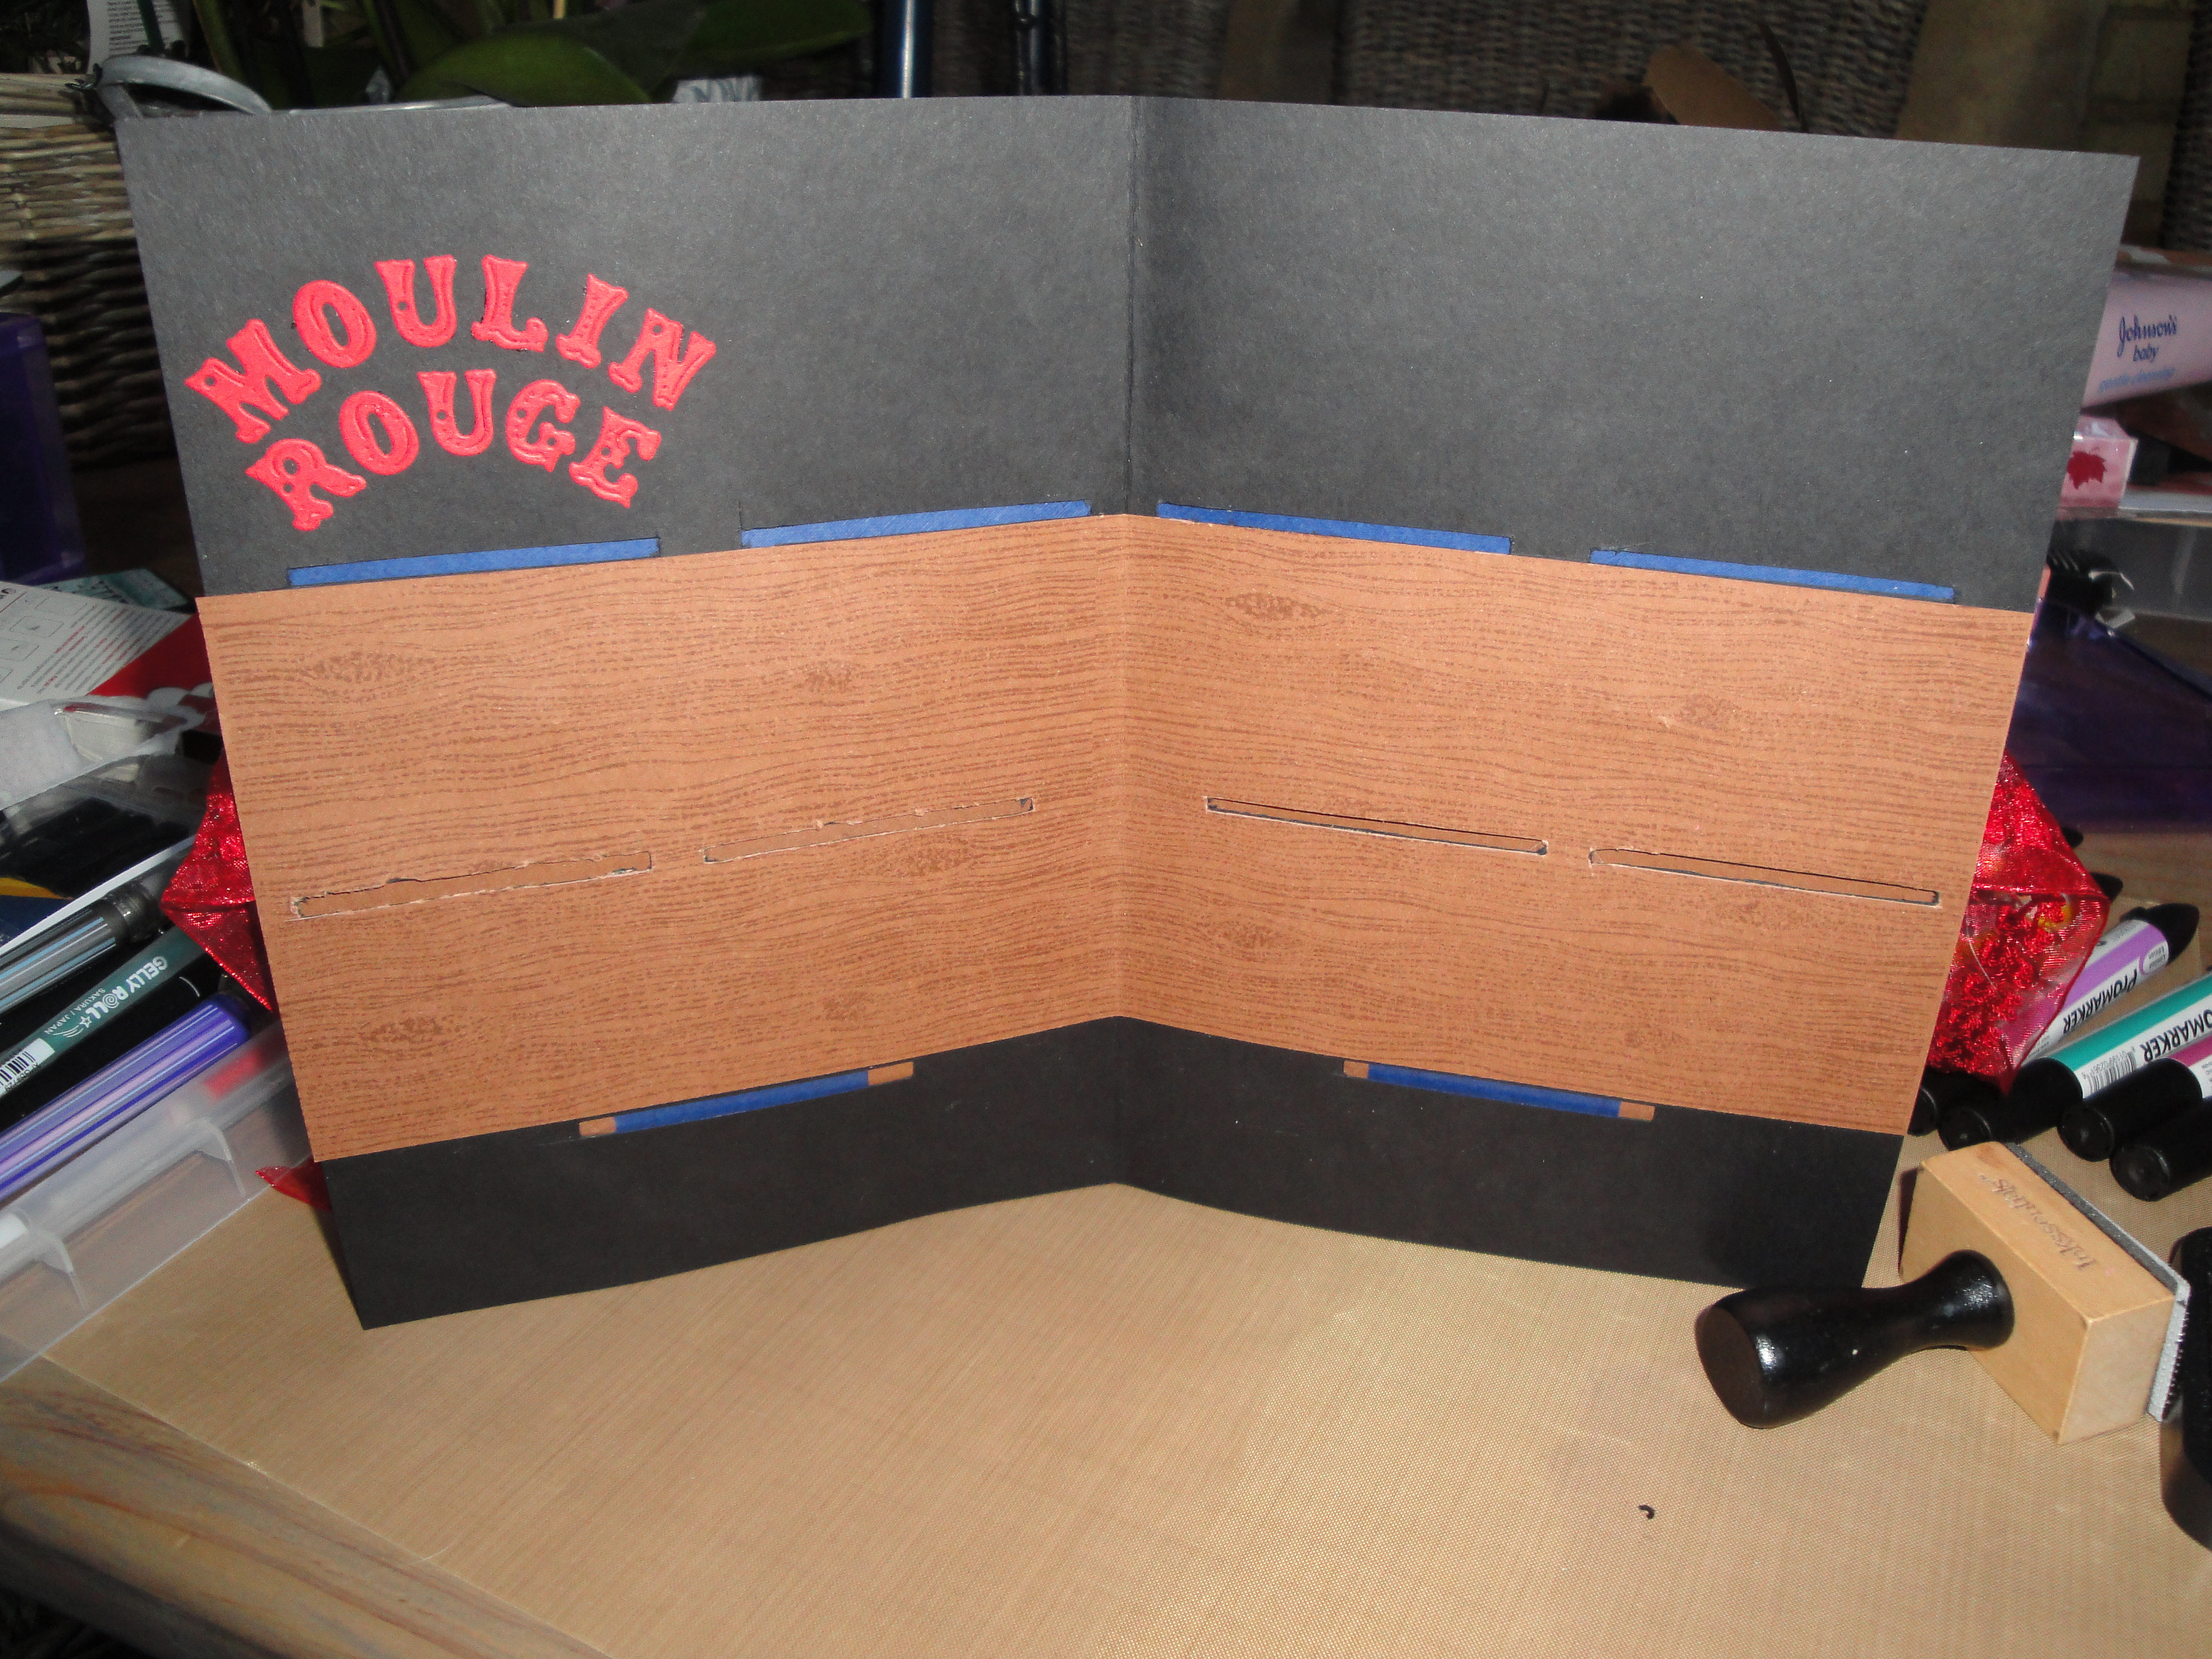
Next I stamped the ‘Happy Birthday’ sentiment from the IndigoBlu ‘Circus Alphabet‘ set in Versamark ink on balck card and used Tim Holtz Distress embossing powder in ‘Fired Brick‘. When it had cooled I cut it out and attached to the front of the windmill with sticky foam pads.

I took an A5 back card for my base and measured it to get a piece of brown card that would be the right size for the ‘stage’ in the middle of the card. After I had cut the ‘stage’ from a 12 x 12 piece of card I stamped it with the wood stamp from the Waltzingmouse stamp set ‘Way out West‘ in Tim Holtz Vintage Photo distress ink. I stapled a red piece of ribbon to the front and back of the card (the staples would be covered on the inside by the ‘stage’ and on the outside by black card panels) then attached the ‘stage’ to the inside of the card with double sided sticky tape. Using the Tattered Lace ‘Circus Alphabet‘ dies I cut the letters to spell out Moulin Rouge and used my glue pen to attach them above the stage.
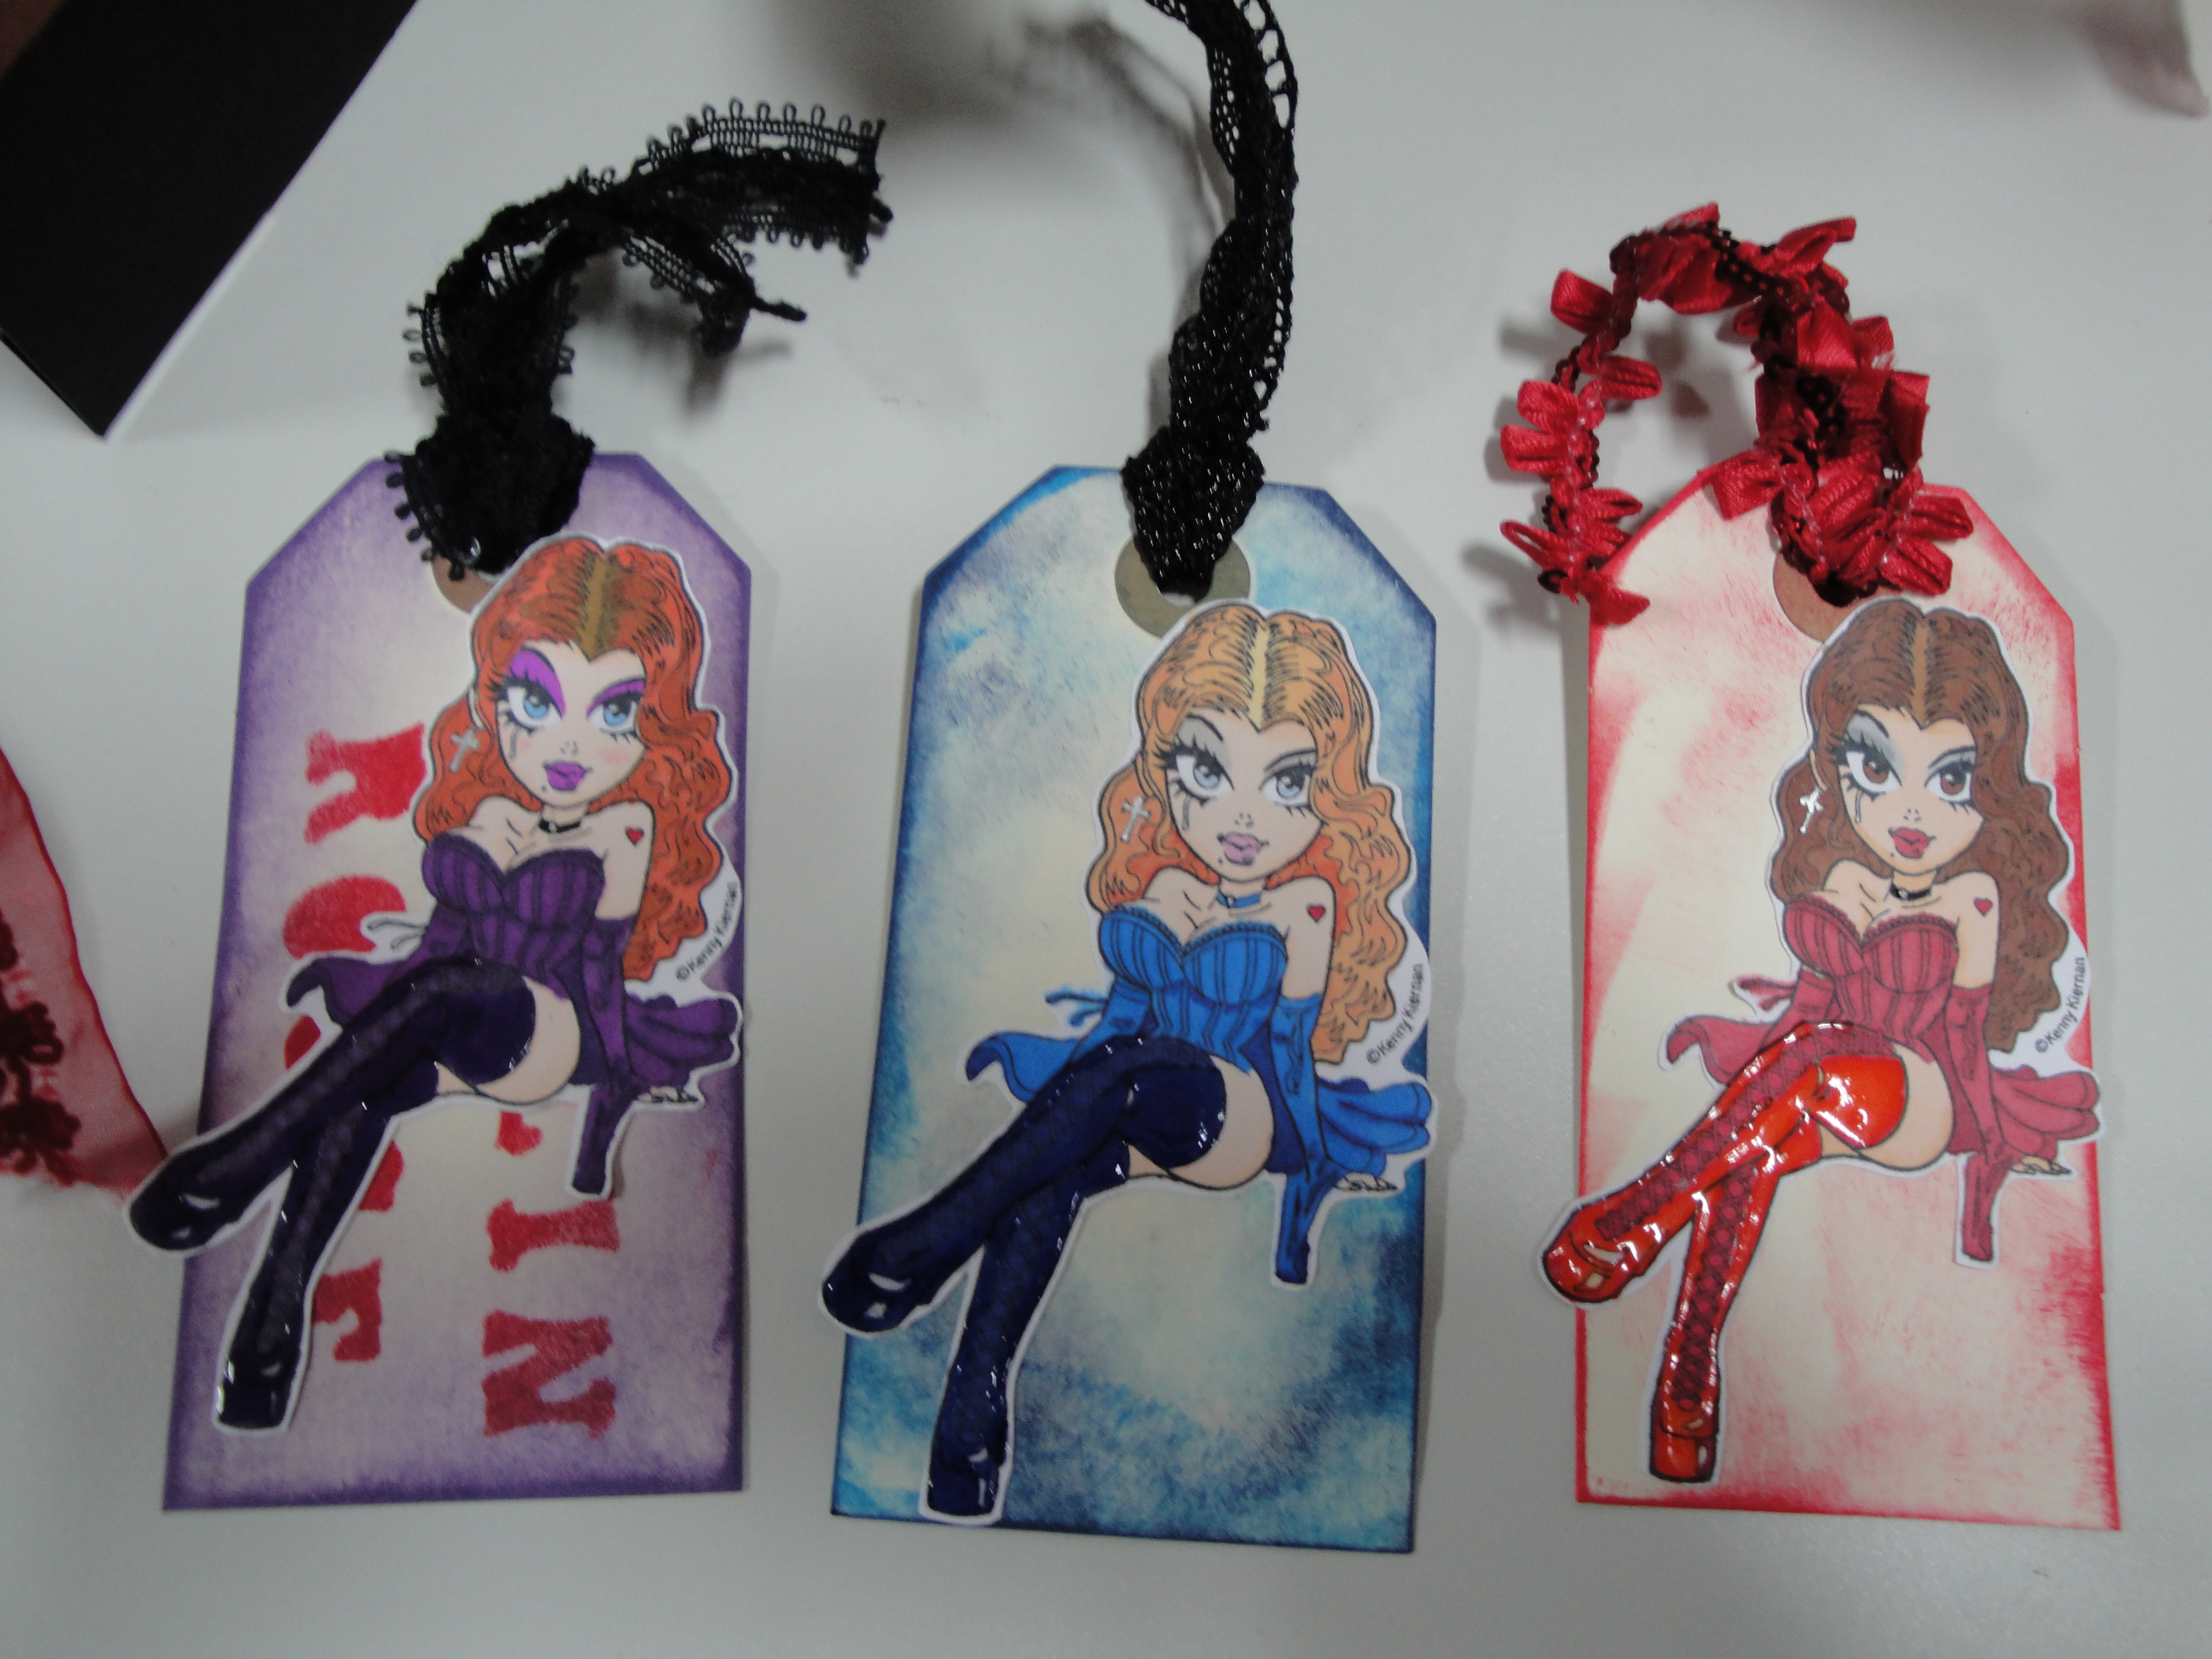
I wanted to put the dancing girls on luggage tags so people could write their birthday messages on the tags, so I needed a way to keep them with the card. I cut ‘postbox’ slits for 10 luggage tags & I hoped it would be enough for people who wanted to wish him well.
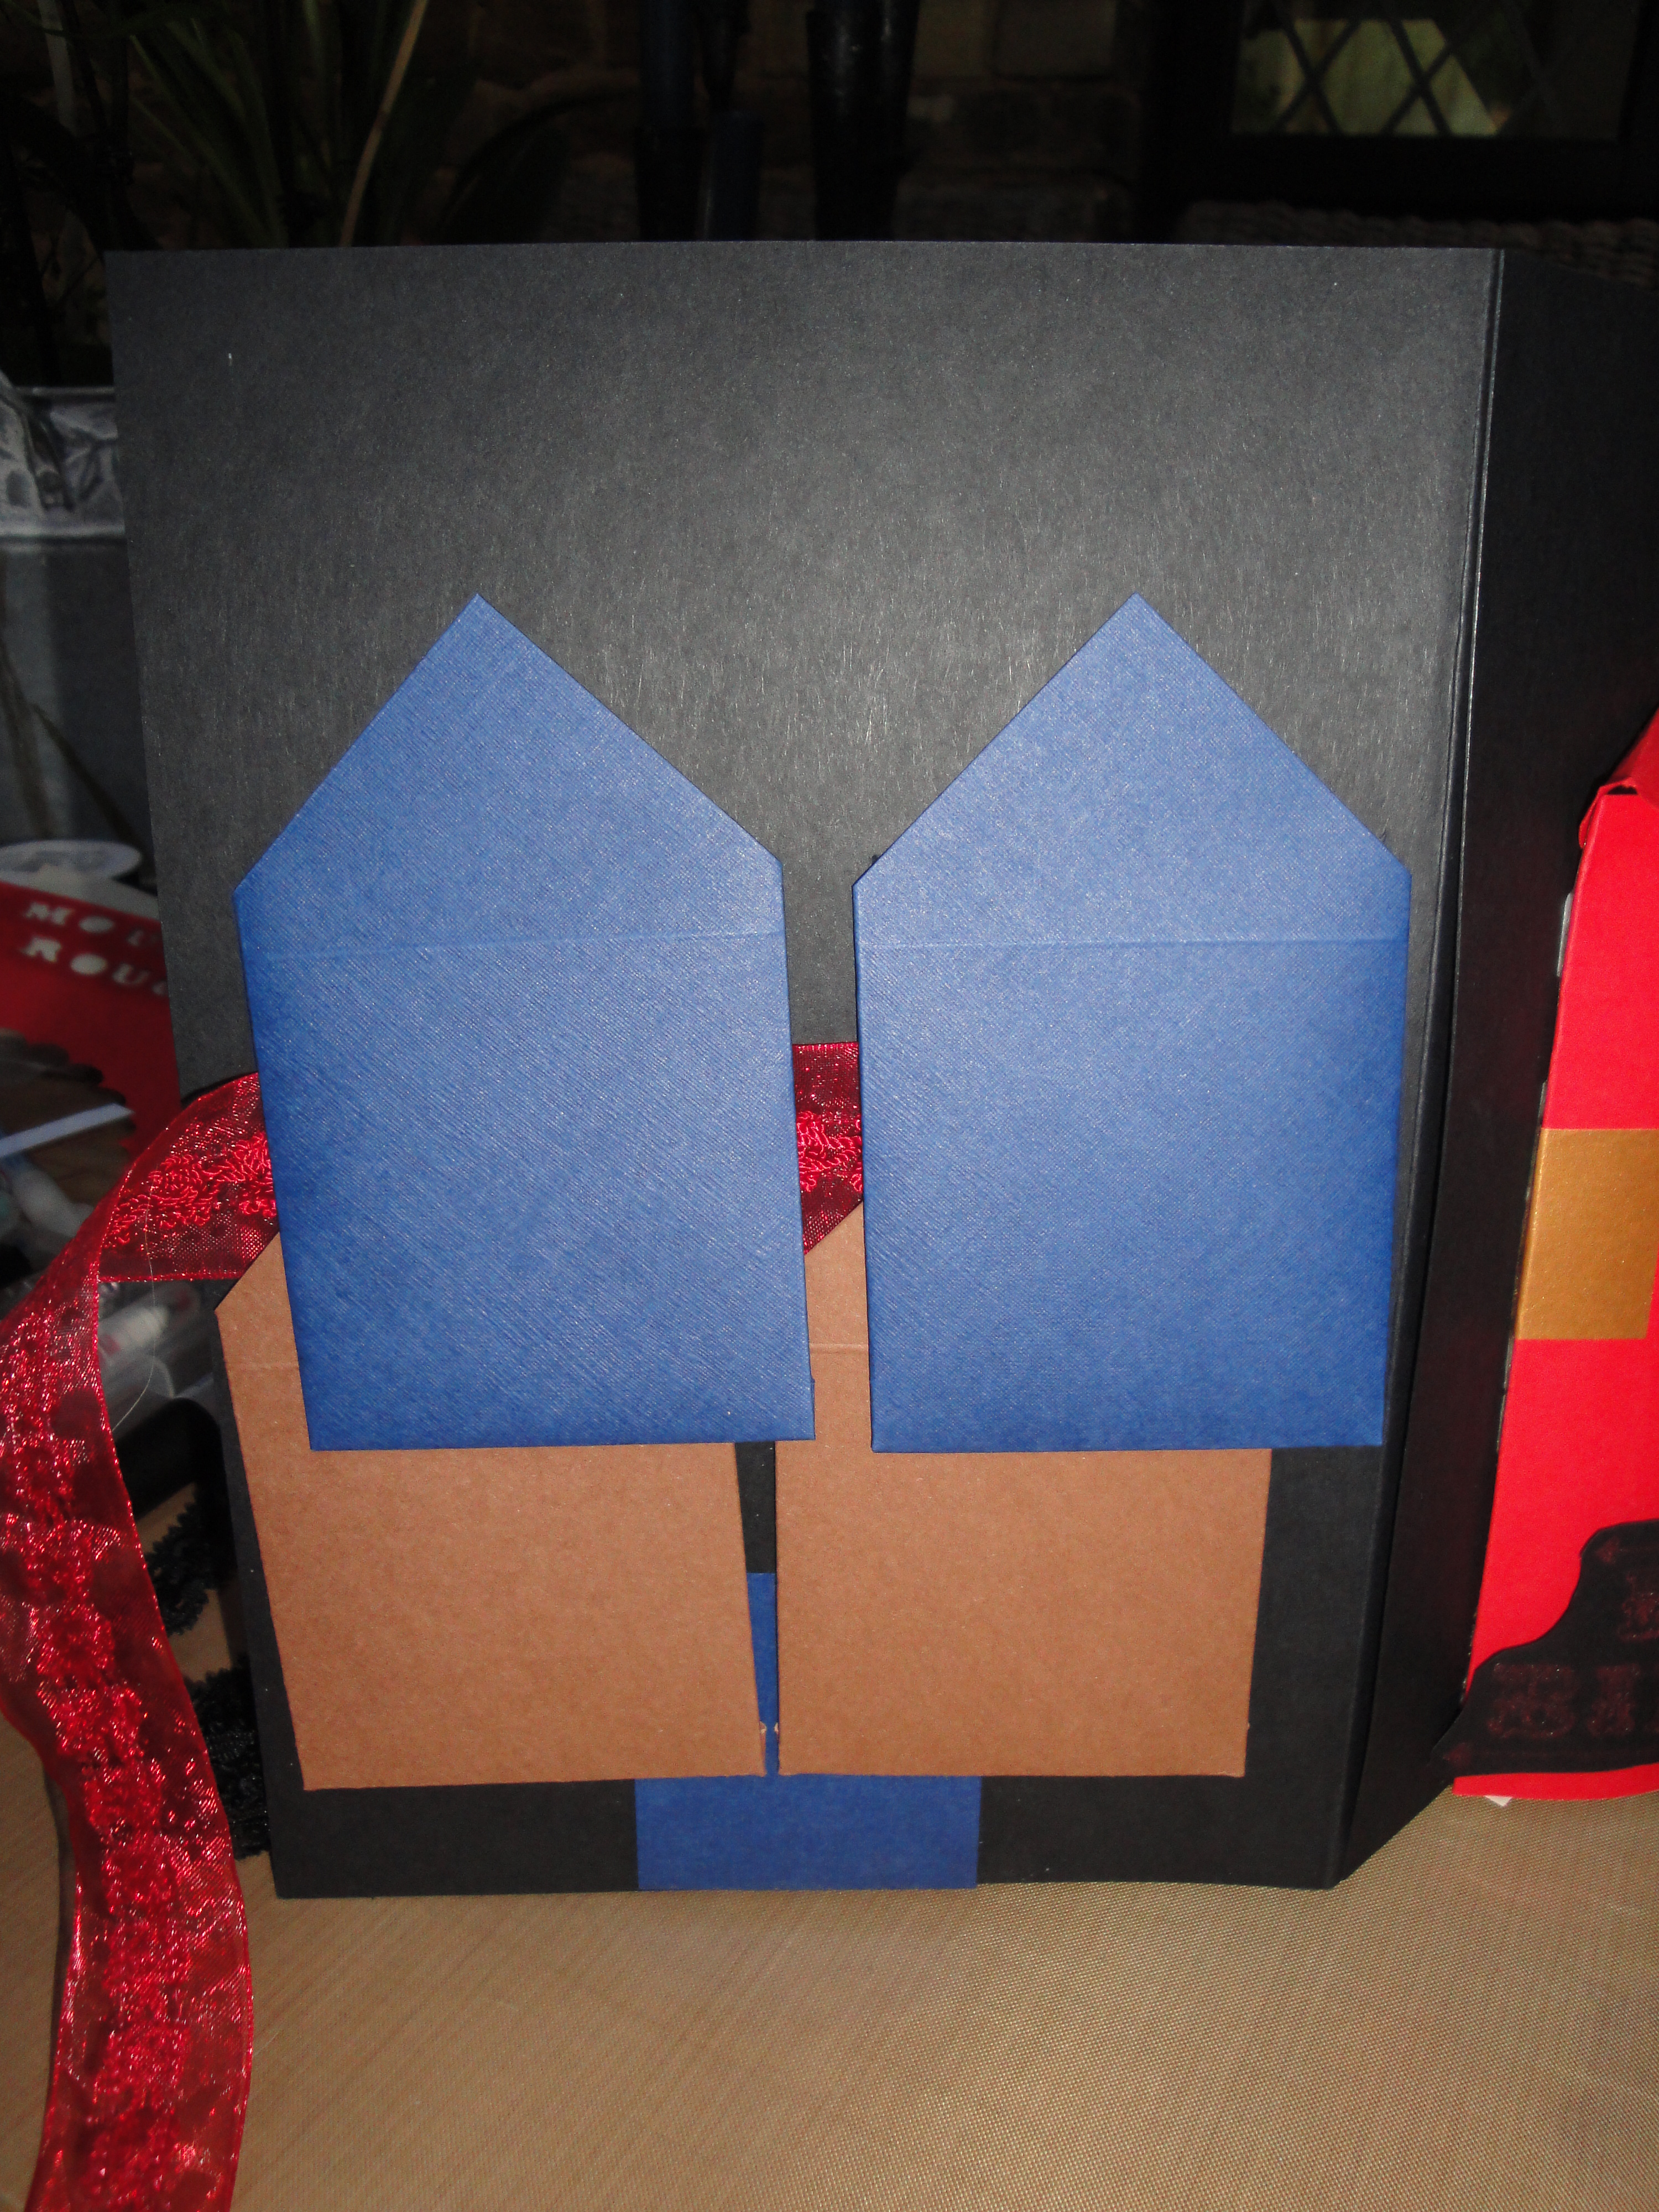
To stop the luggage tags going in to their postbox slot & then dissappearing inside the two card panels I created mini envelopes, but for the last few I gave up and just stuck on strips of paper so the luggage tags would be held in place.
I attached the windmill to the front of the card and a plain piece of black card to the back to cover up all the ‘internal workings’ of the card so it was a bit smarter.
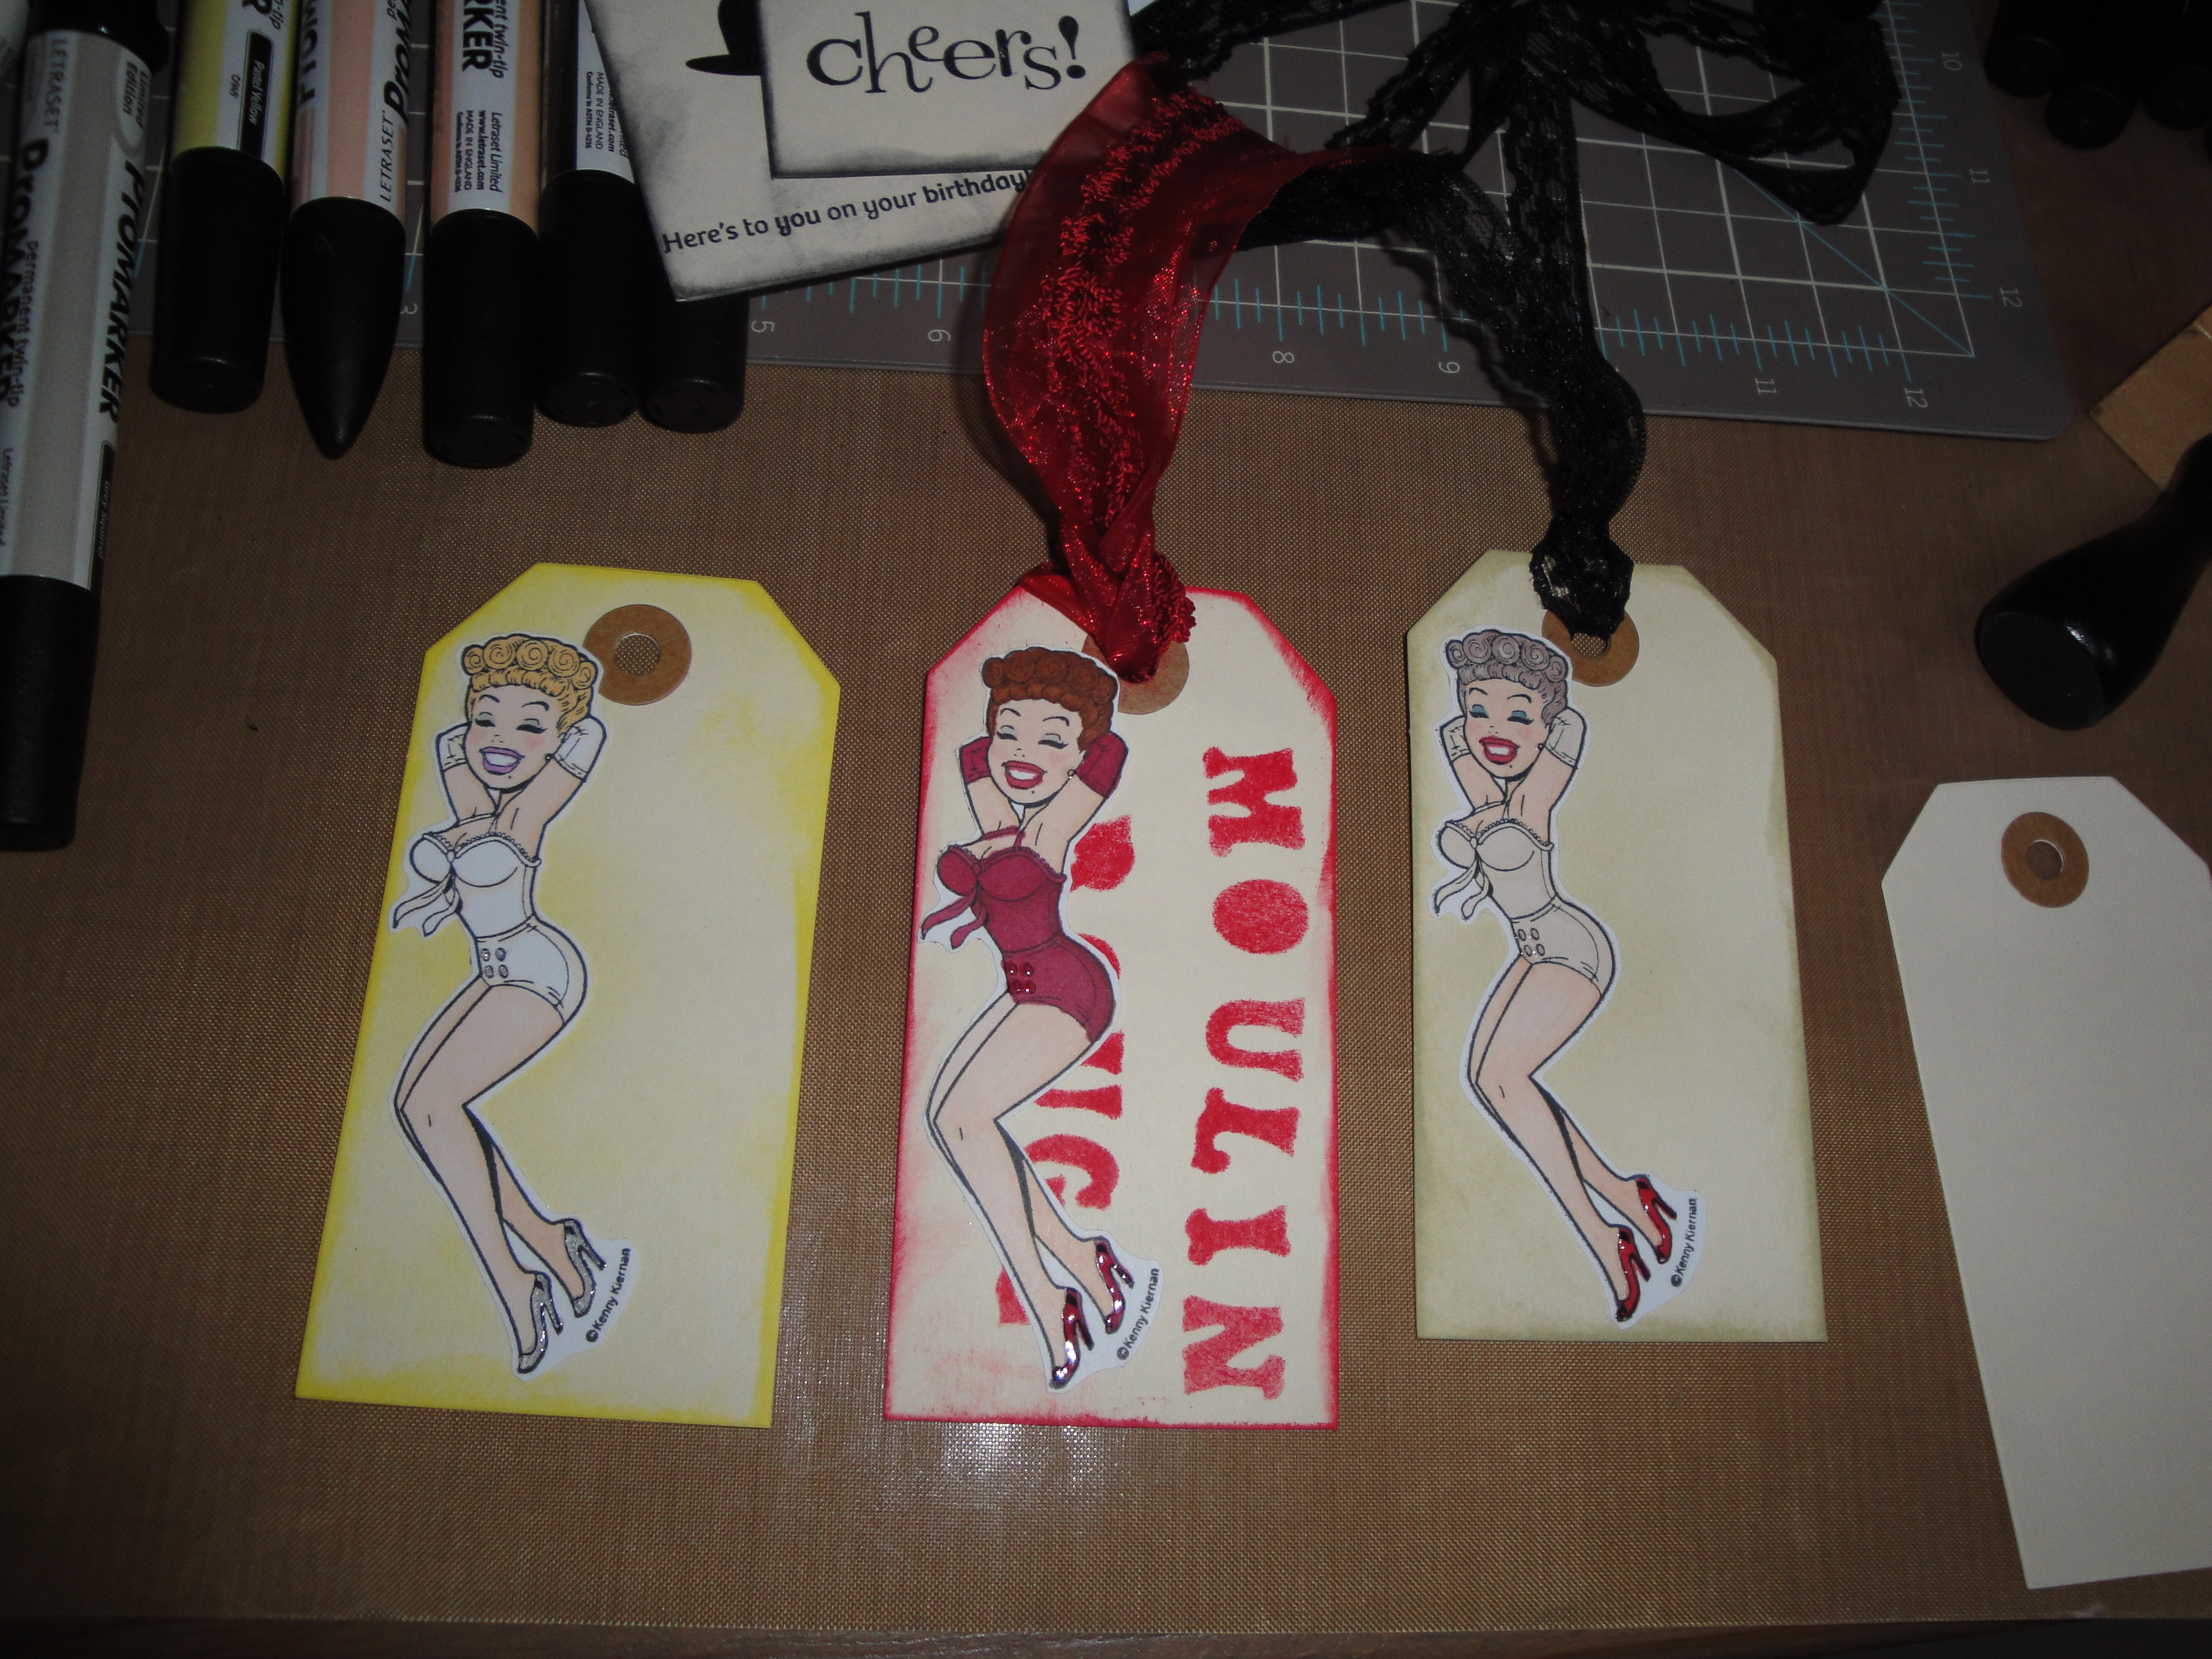
The most important bit was to decorate the luggage tags. I made two ‘gentlemen’ watching the show because my colleague’s department is a bit thin on the ground with men! I used Black Soot distress ink and a sponge applicator to go around the edges of the luggage tags and stamped ‘manly’ things on the tags with stamps from IndigoBlu’s ‘Mr Fan-tash-tic‘, Waltzingmouse ‘My Kind of Guy‘, Stampin’ UP! ‘Happy Hour‘ in black Archival ink. I found some nice back organza ribbon to thread through the tags, job done!

Next was the ‘dancing girls’ tags! I stamped the Whimsy Stamps ‘Showgirl‘ in Memento balck ink four times and ‘Bodacious Bev‘ three times. I coloured the girls in Promarkers and added Glossy Accents to bits for interest. I mixed it up for the girls tags and used red and black ribbons that had sparkly bits & sequins on!
So here is the finished card!