
Hi! This is my second card for today. So I didn’t leave myself enough time to make this card… So the sentiment has been stamped SOOOOO badly – it was my second go at the sentiment as well, but I had to go with what I got – I’m not proud of it at all, it’s dreadful!!!
As I said in my previous post I wanted to have positive sentiments on all the cards I’m making for my friends as they all seem a bit disheartened at the moment. My friend LOVES skiing and has just come back from a skiing holiday with friends, so I wanted to reference this in some way with her card. She is very active and loves to try different outdoor activities like dirt bike riding, hiking etc. so this sentiment is so apt for her.
I’ve had the Tattered Lace ‘Scene Stepper’ die set for ages, but never got around to using it. There aren’t any YouTube videos on how to use it, so I’ve taken loads of pictures so if you have the die set you can get some inspiration.
First I die cut the main die from some Stampin’UP! 80lb Whisper White card stock. I folded and burnished the card, and found that the crease lines for the side steps had almost cut through the card (note to self – always use heavier weight card stock for the card base!!). I must admit I didn’t have any heavier white card stock at home and no time to go shopping for any either, so I used some sellotape to hold the crease lines together!


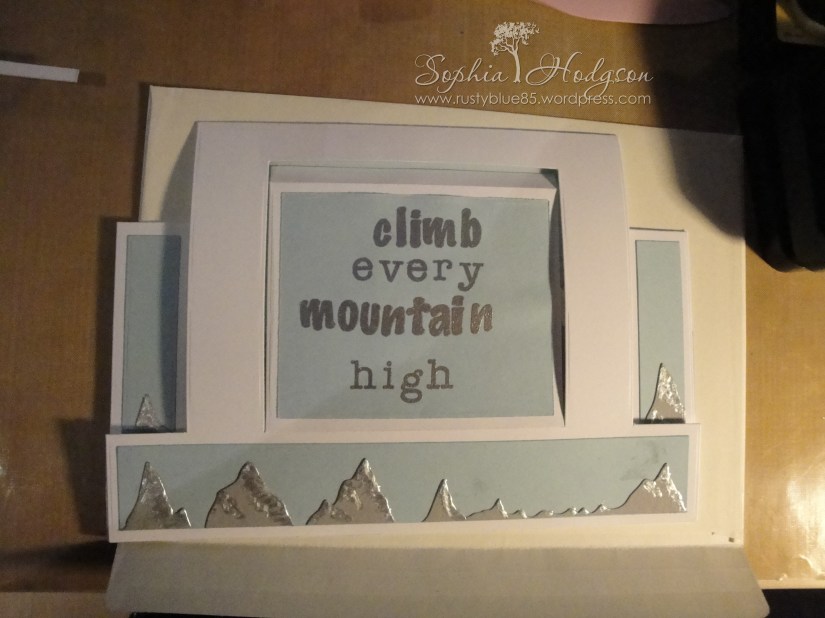
I die-cut just the section I wanted to go inside the back of the card from ‘Pool Party’ card and trimmed it so it would be just smaller than the actual card. I also die-cut the rectangles to go on the two sides, front and ‘scene’ inner section from the same card stock. To create the mountains I used the mountain die in the set and cut several times from ‘Smokey Slate’ card stock. For the two side rectangle sections I used the same rectangle die that I had used for the blue card to cut out mountain bits to make them exactly the right size.

I stuck the mountains to the blue sections with Nuvo Glue Pen. To create snow on the mountains I used Liquid Pearls by Ranger in ‘White Opal’. I then set the sections aside to dry.

Whilst waiting for the liquid pearls to dry I started on the sentiment panel. I was planning to use the sentiment ‘climb every mountain high’, but I don’t have that as a sentiment, so I decided to try to make it out of my alphabet stamps, one is the Stampendous! ‘Typewriter Alphabet’, the other one I don’t have the details for any more. I stamped using VersaMark ink and Stampendous! embossing powder in ‘Sterling Silver Metallic’. So… the first time around I stamped the ‘mountain’ in the wrong place, so I hadn’t left enough space between it and the top of the section to stamp ‘climb’ and ‘every’, so when I realised this I started again, but still got ‘mountain’ in the wrong place!!! So it’s too far to the right… I had to stick with this one though because I had run out of card stock to die-cut another rectangle. (I need to buy so much SU! card stock when I get some money!!)
When I came to stick the sections on to the card base I realised that some of the glue I had used to stick the mountains on to the front panel had gone on the blue and become all grubby 😦 I tried to rub it off, but it just made the whole thing worse!! I didn’t have enought time to do it all again, so I just had to stick it to the card base. This is the worst card I have made for a very long time, and I hope my friend doen’t think the quality of the card refletcts on how I think of her…


I must be a very bad/disorganised friend to have left things so last minute to have made such a bad card for my friend!!! Maybe you can learn from my mistakes and make sure you use heavier cardstock and give yourself more time!!!


Hi Can I ask how you folded the card when you had finished it. how do you get the platform to lie flat.
Hi Janice, the central platform slots into a cut out on the back of the card, so to mail the card don’t apply adhsive to the tab that fits thorugh the slot and make a note to the recipient that they need to put the central platform through the slot to get it to stand up. I hope that helps? Sophia x x