
Well this card took a lot more effort than I had anticipated!!
I started making this card in September as one of my #SophiasSlimlineSeptemberSeries but it has taken me until NOW to complete it!! I thought this would be ‘so simple’, but it caused me a few little headaches…
I wanted to do a slimline Halloween card and I wondered if I should do a scene card, but thought that that might involve a lot of hassle (as I’d already done the multiple underwater slimline cards and the bridge card with the cats) I decided to go ‘clean and simple’.
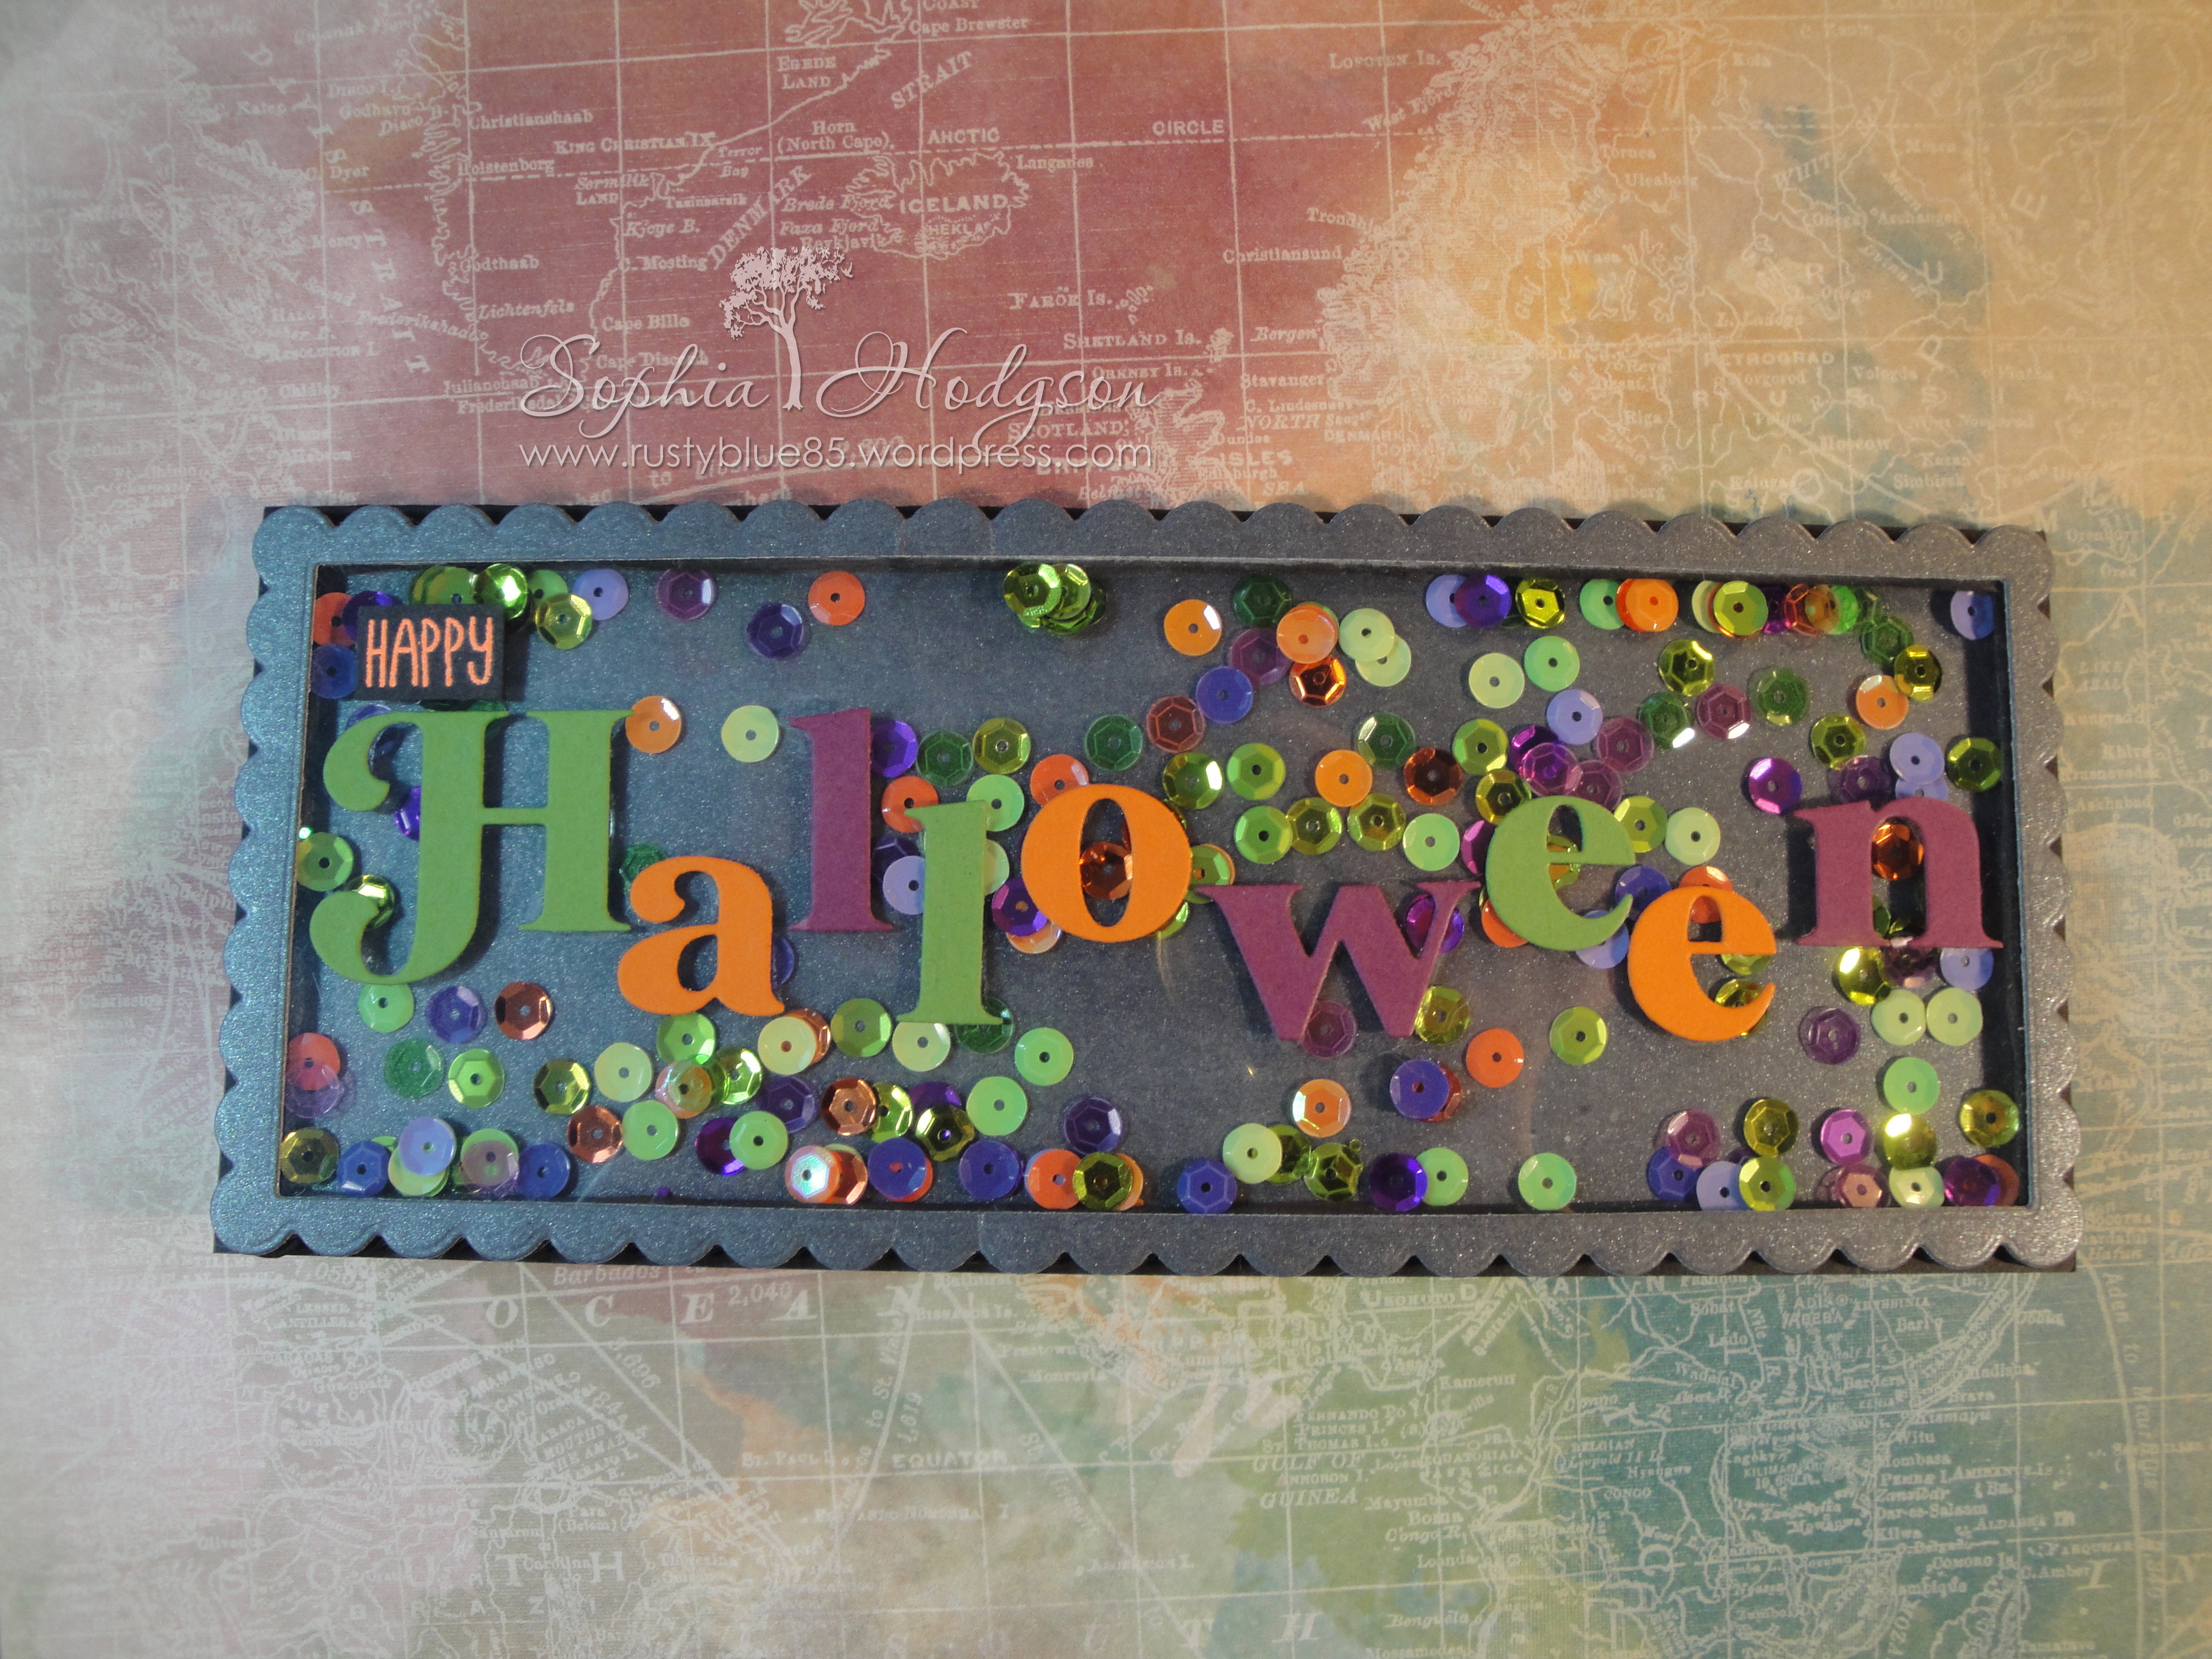
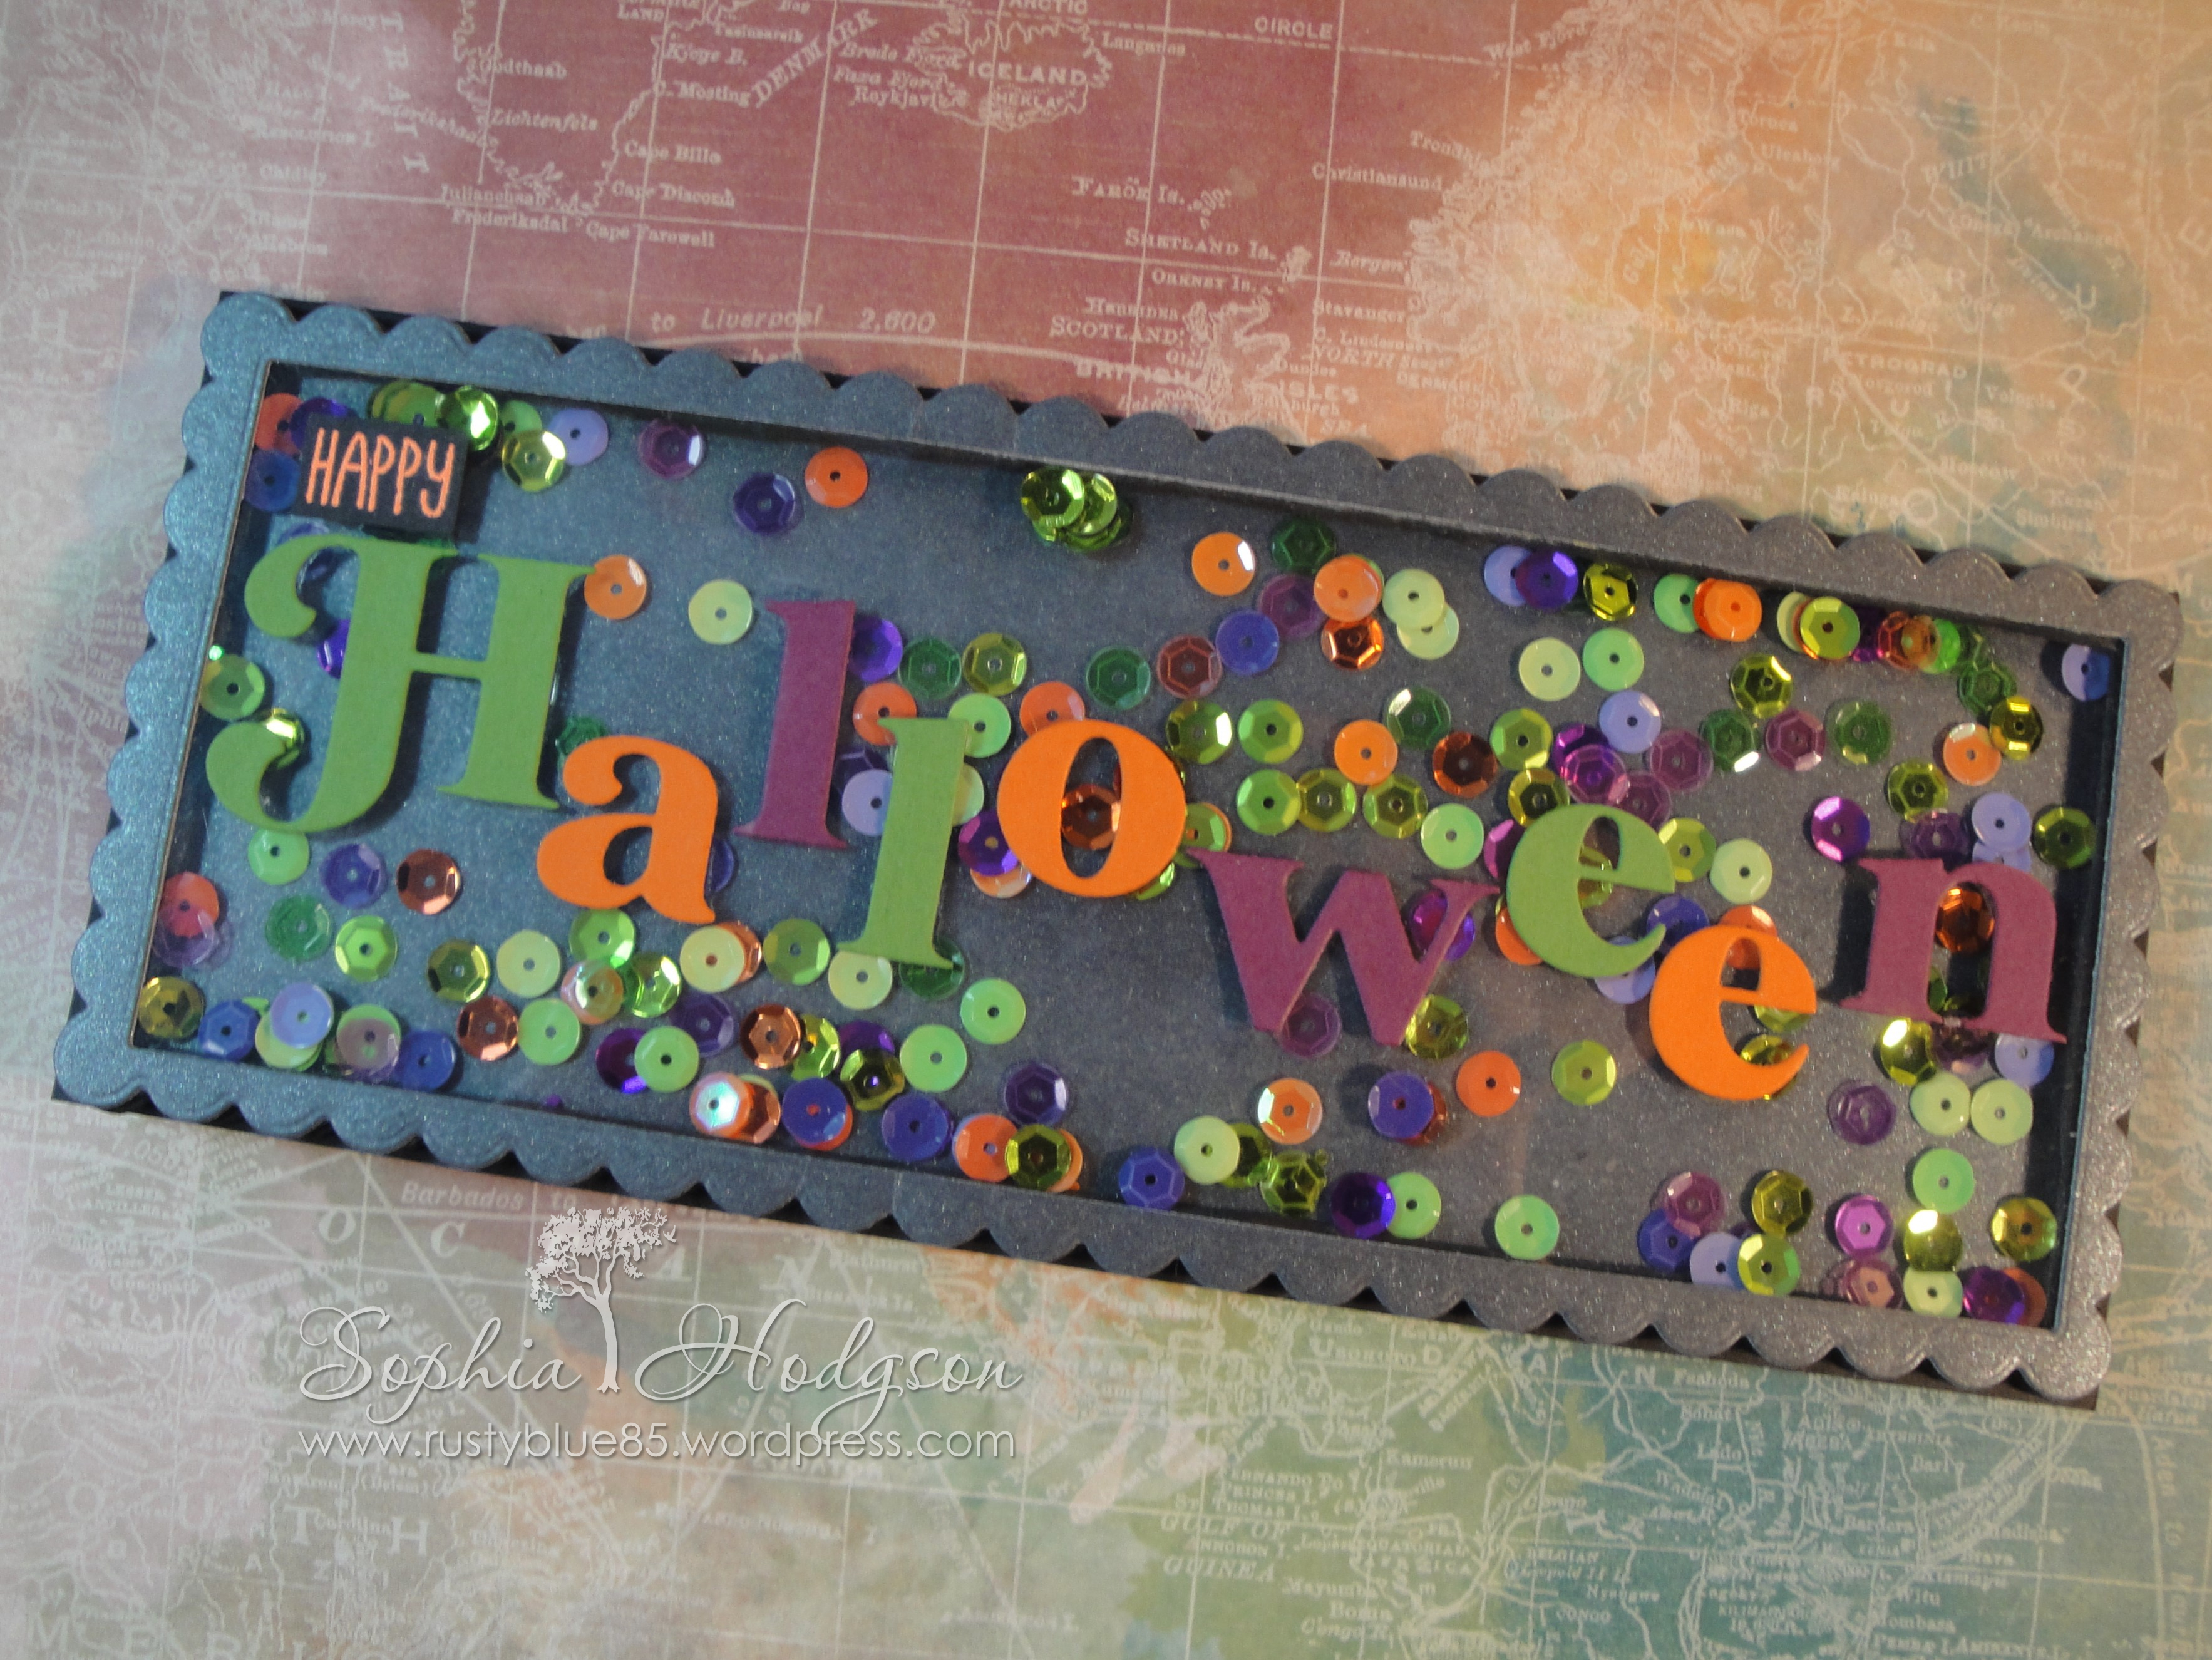
I started with a black piece of card 8 1/2 inches x 7 inches, scored at 3 1/2 inches to make my card base. I then die cut the scalloped rectangle from the Mama Elephant ‘Slim Card Basics’ dies from some metallic black card twice (once for the front of my shaker, and once for the back). So far, so good!
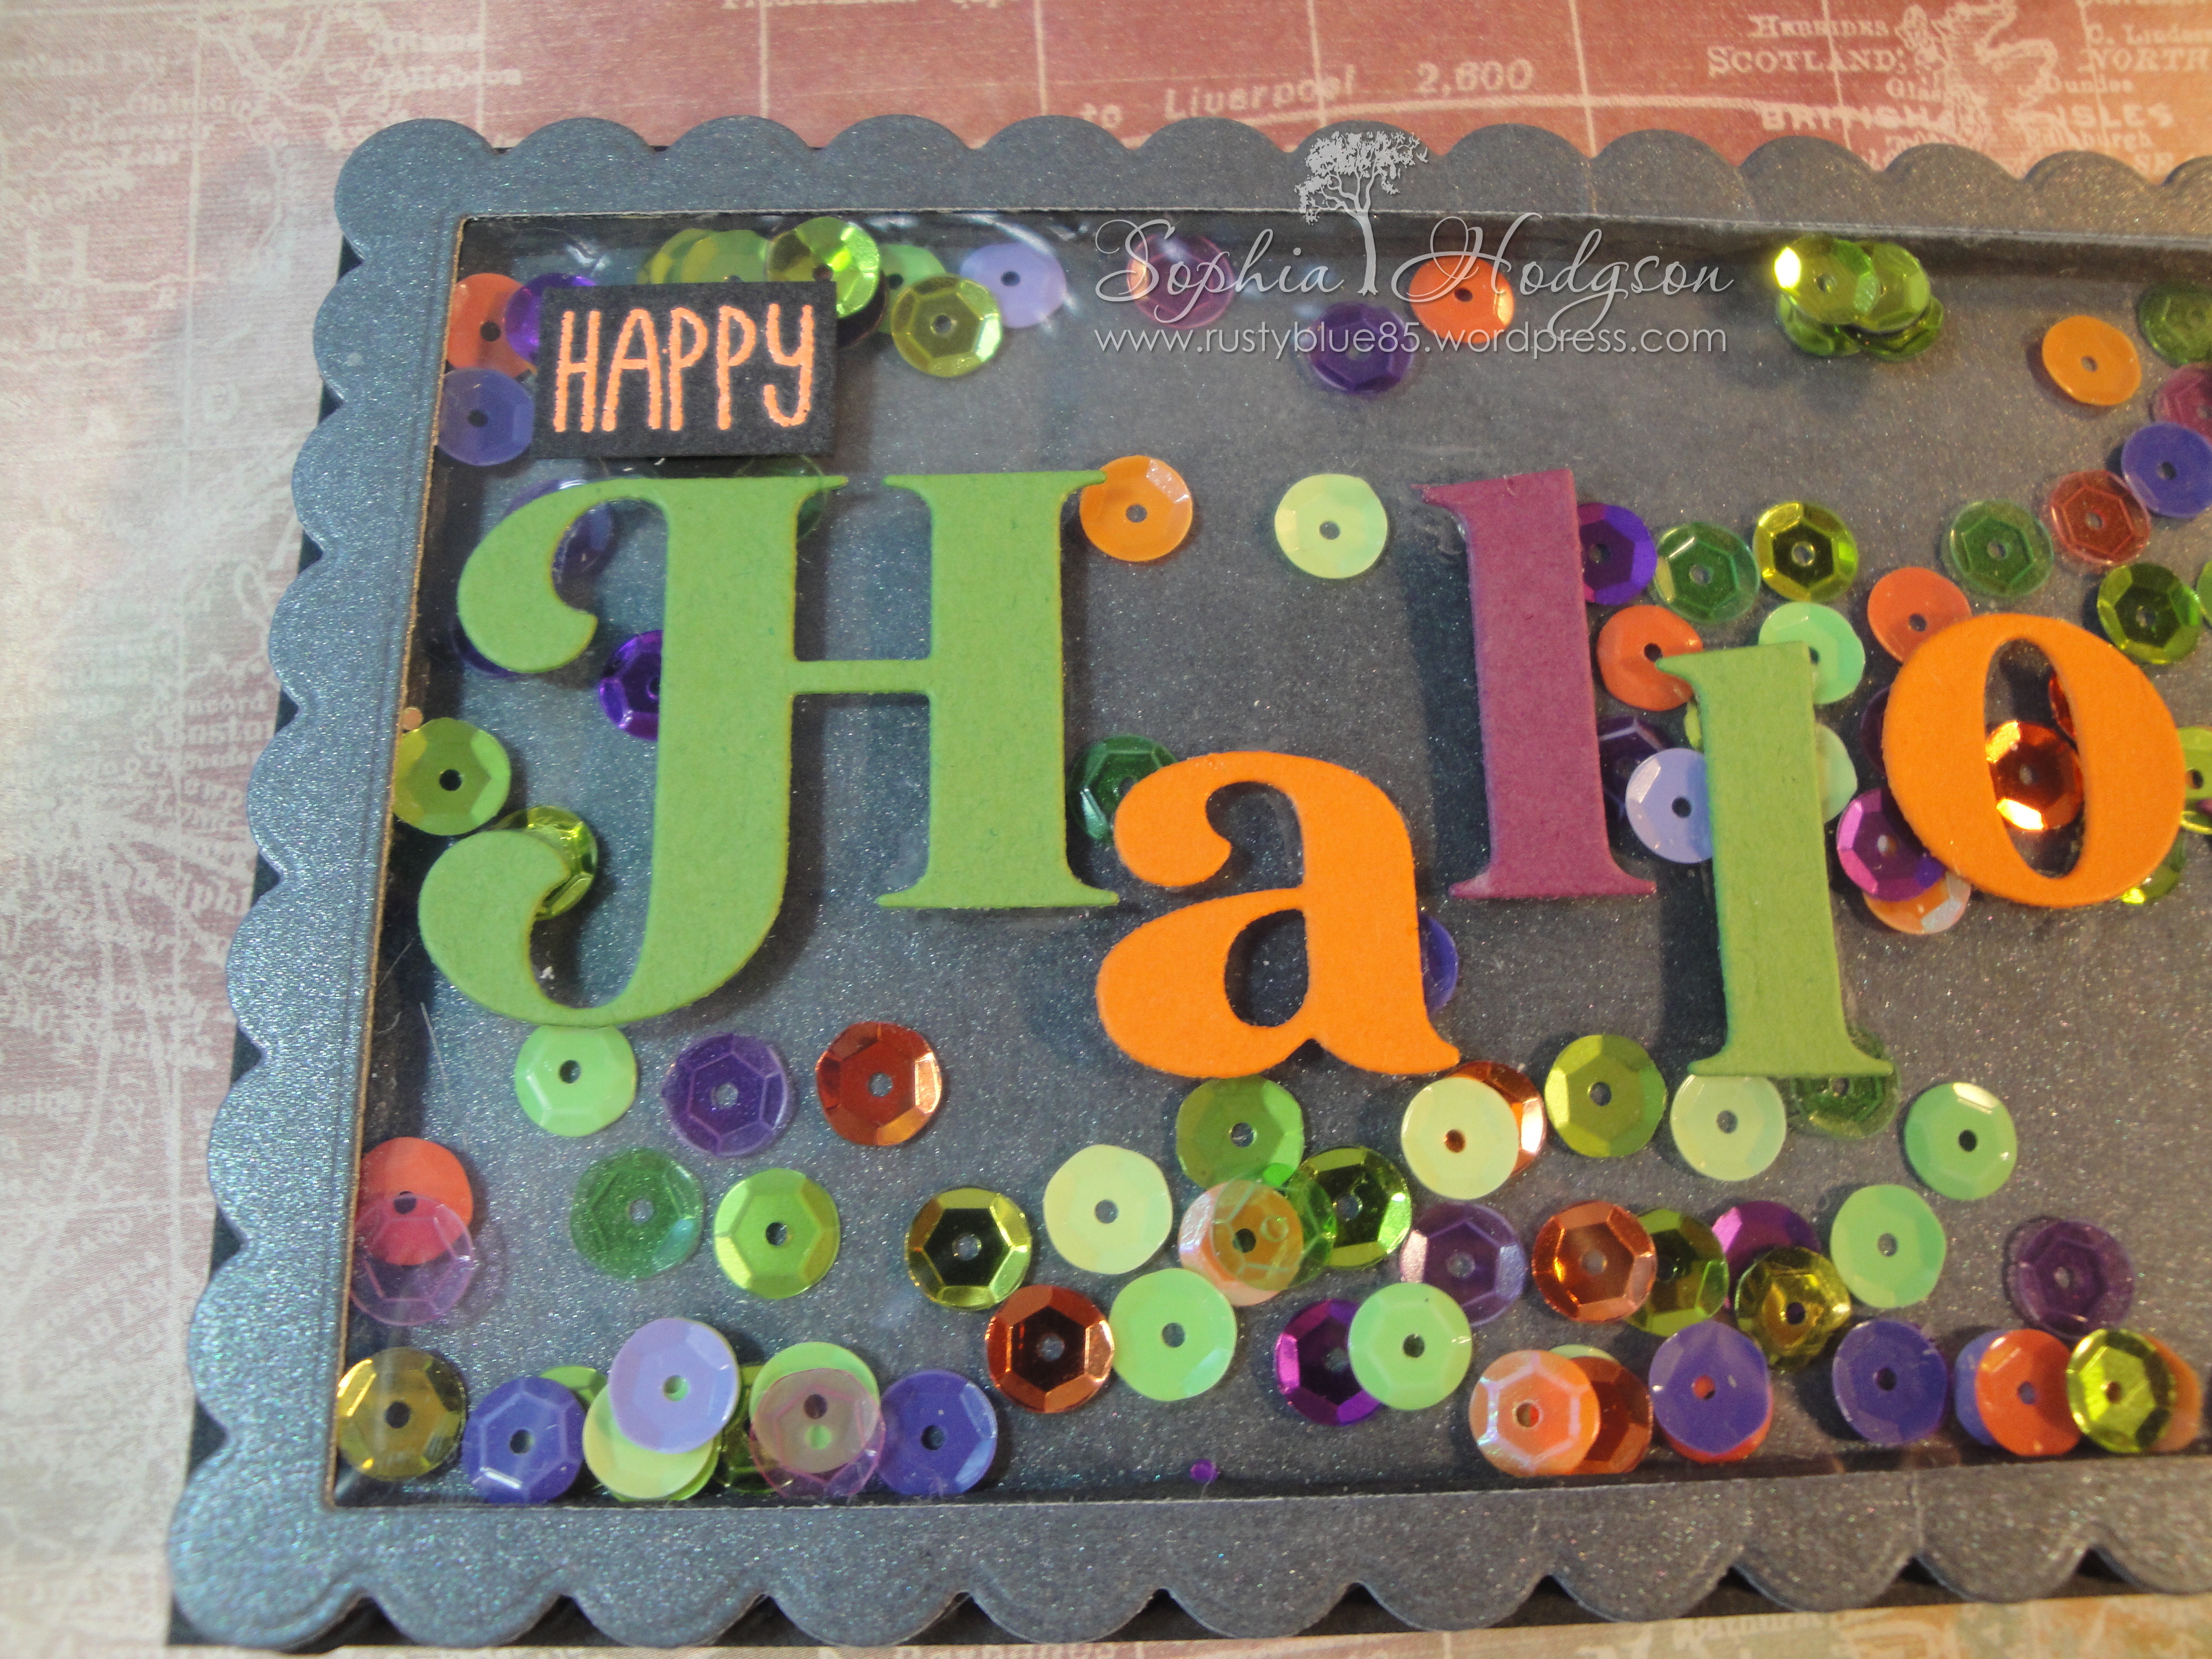
I knew I wanted to have Halloween spelled out across the front of my card in the Pinkfresh studios ‘Lea’s ornate uppercase’ and ‘Heather’s lowercase’ alphabet dies so I die cut them from scraps of Stampin’UP! card in green, orange and purple. For the ‘happy’ I stamped and heat embossed one of the sentiments from Honey Bee Stamps ‘Hello Pumpkin’ stamp set in Stampendous Vivid Orange embossing powder.
Now that I had all the bits I needed for my sentiment, I just needed to finish off the shaker element. I used the stitched rectangle from the Mama Elephant ‘Slim Card Basics’ die set to die cut one of the metallic black scalloped rectangles so I was left with a frame. I then went to die cut some heat resistant acetate with the scalloped rectangle die. I had soooooooooo many issues with attempting to die cut the acetate. No matter how many card shims I put in it would NOT cut (to the point my Gemini reversed the plates because the sandwich was too thick). So in the end I had to cut the acetate with my scissors (the die had made an impression, so I wasn’t cutting blind, but still I was not made to cut scallops by hand). This took several attempts and I had lots of cuts on my fingers from the sharp edges of the acetate, I also lost the scalloped acetate window for a few days and didn’t want to start all over again! Once I had cut the acetate ‘window’ I attached it to the metallic black frame with double sided tape to create the front of my shaker.
Then the next issue popped up – I had no idea how I was going to create the dimension at the edges of the card to enable the sequins to shake as the metallic black scalloped frame was incredibly thin. I eventually decided to die cut some black fun foam with adhesive on the back twice to create two frames. It die cut just fine. Unfortunately, I had eyeballed all the frames so they were all just a smidge different from each other. First I adhered one fun foam frame to the back of metallic black scalloped frame with the acetate, then I adhered the second foam frame over the first. I snipped off any bits of foam frame that would show through the acetate window. Then, to ensure that sequins wouldn’t stick to any exposed adhesive I went around the inside of the foam frame with my anti static powder bag.
I filled the shaker with sequins, then adhered the metallic black scalloped rectangle to the back of the shaker to seal the whole unit. Next I adhered the sentiment to the front of the acetate with liquid glue, but I should have done this before I added the foam frames because it was really difficult trying to hold the letters down without them slithering all over the acetate and making a mess!
At last I was ready to adhere my shaker to the card base with liquid glue and my card was finished!
Do you have a dogged “I started so I WILL finish!!” attitude?

