Well I’ve handed in my first draft of my annual report, so I figured I could have a quick bit of crafting this evening!
I love pillow boxes and other little treat boxes, especially if you can colour-coordinate them to a card or gift tag. So I’d like to include a little tutorial for how to make a six sided treat box.
Things you will need:
- a 12×12 piece of card in your chosen colour
- a 12 inch wide paper trimmer
- We R Memory Keepers ‘Candy Box Punch Board’
- Scissors
- Strong glue
- Ribbon/twine
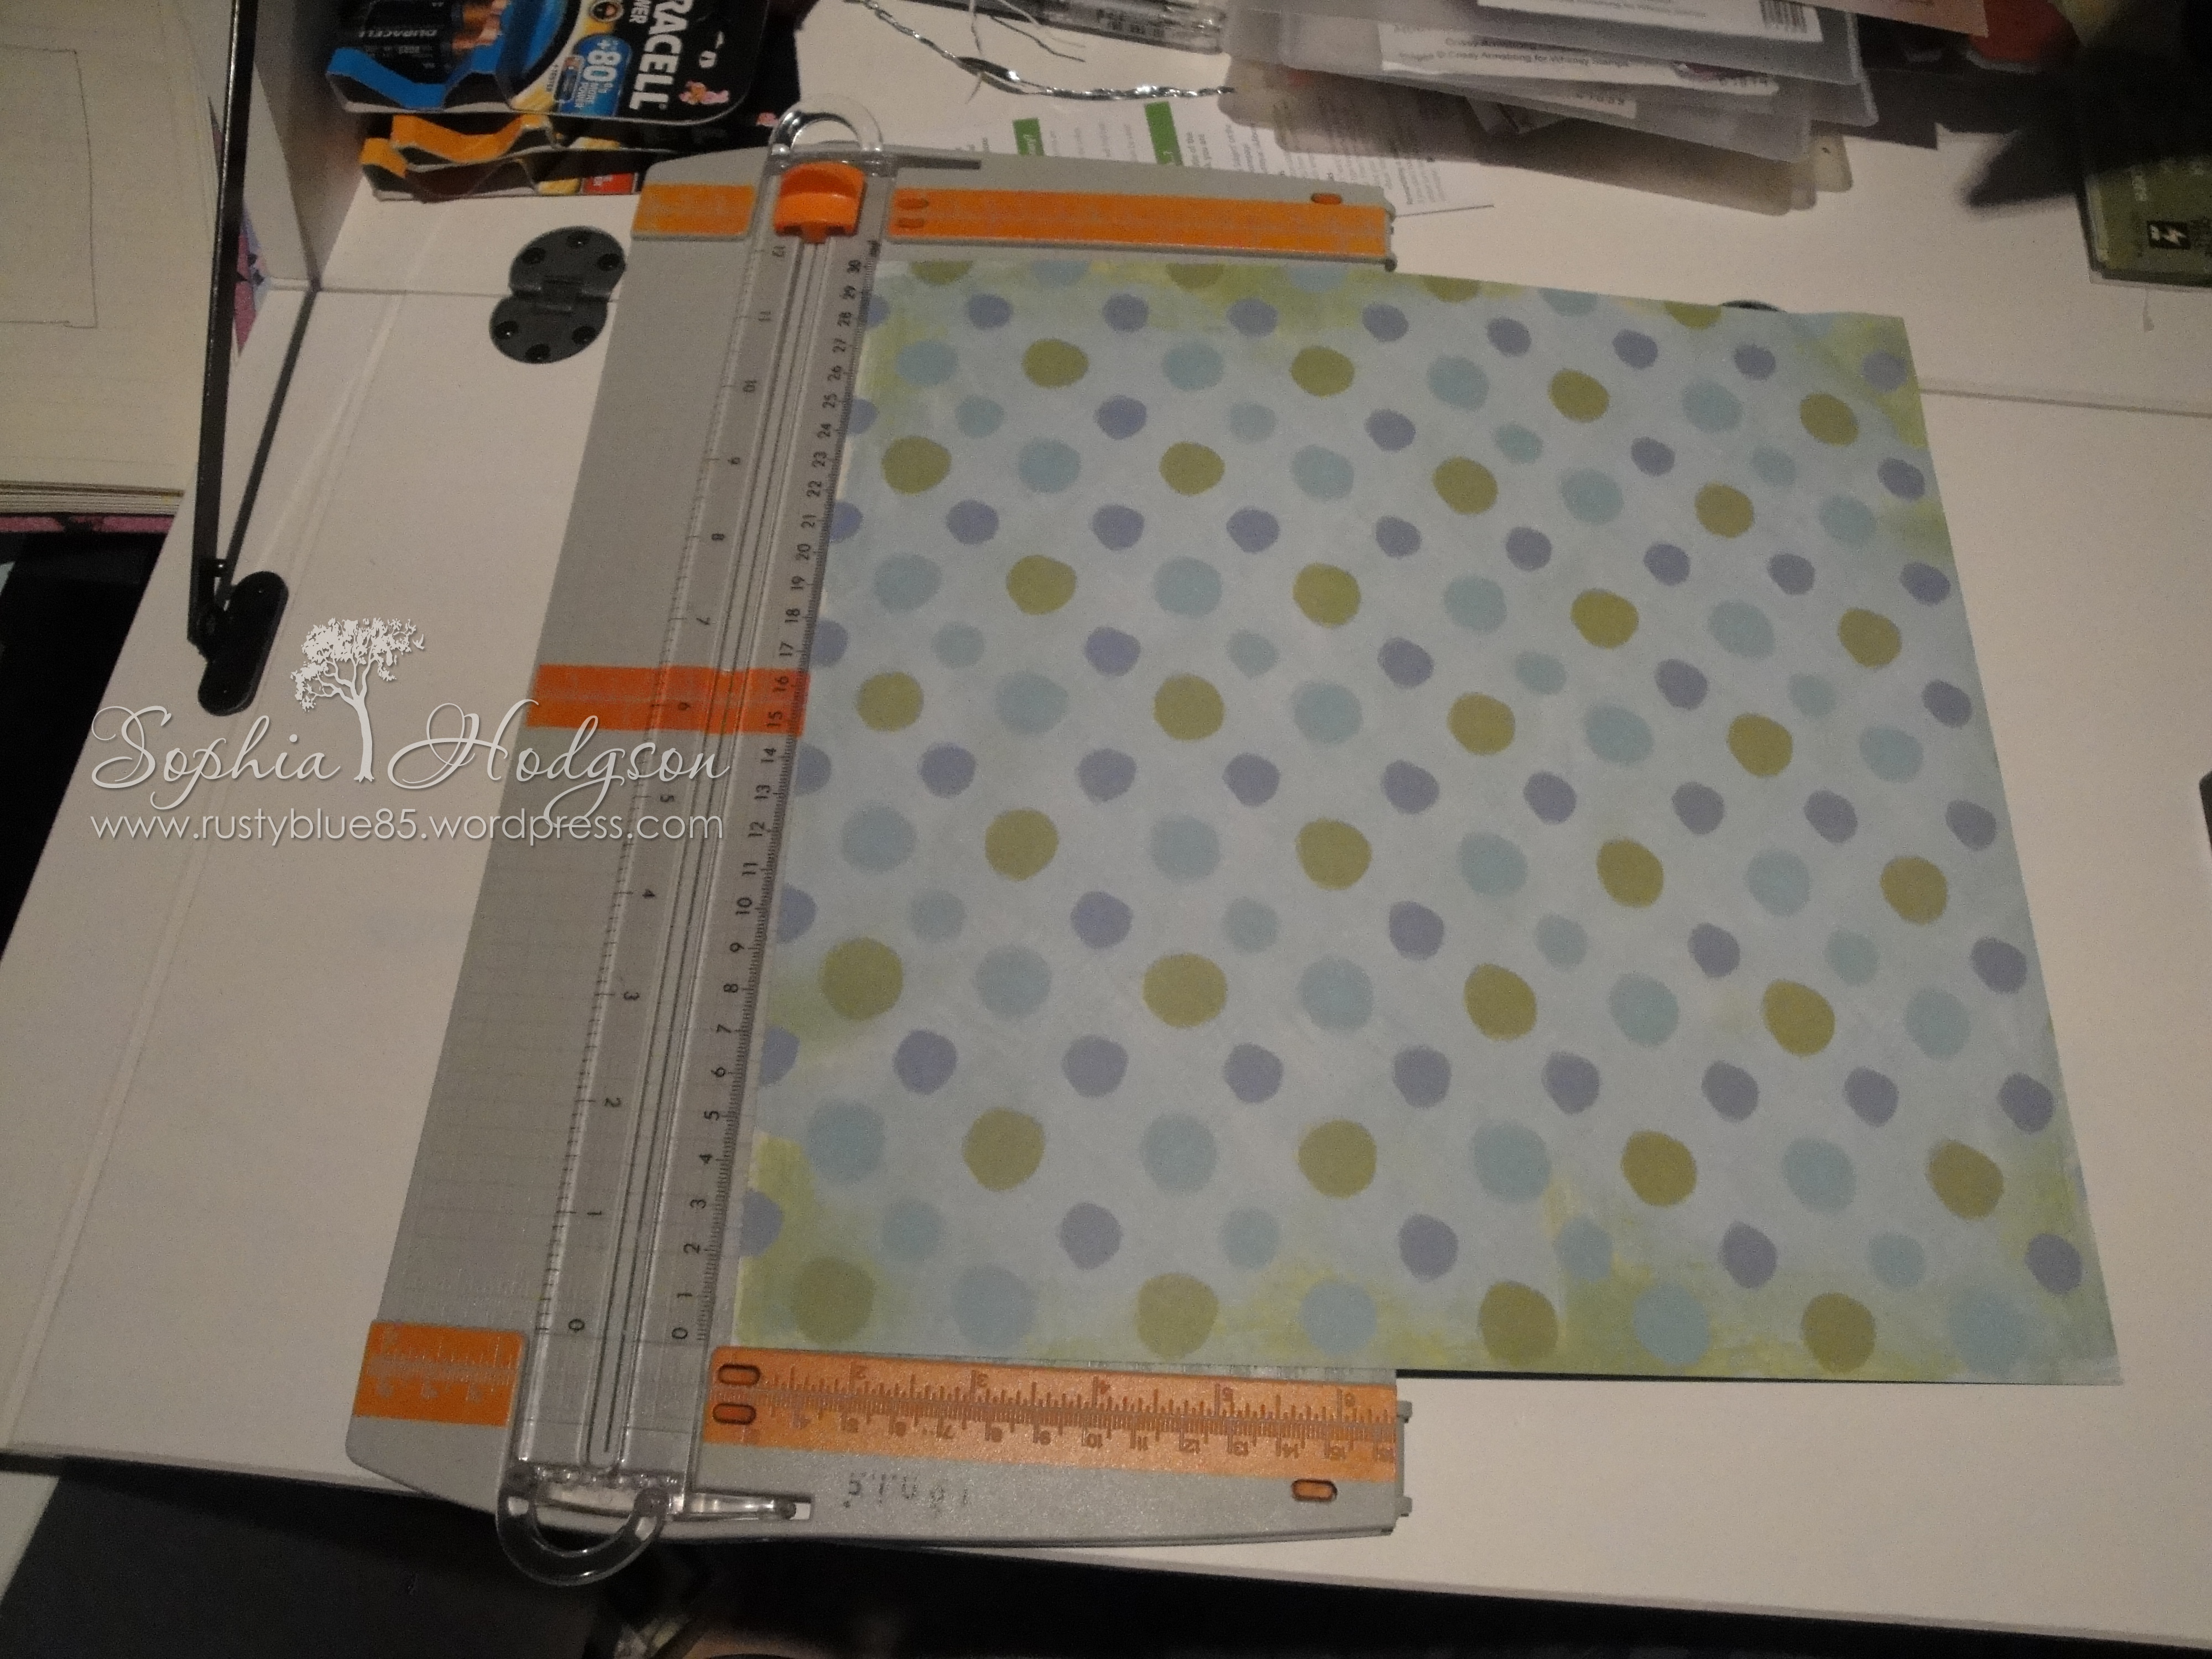
Start with a 12 x 12 in sheet of paper (Picture A), then cut it down to 11 x 9 in (Picture B).
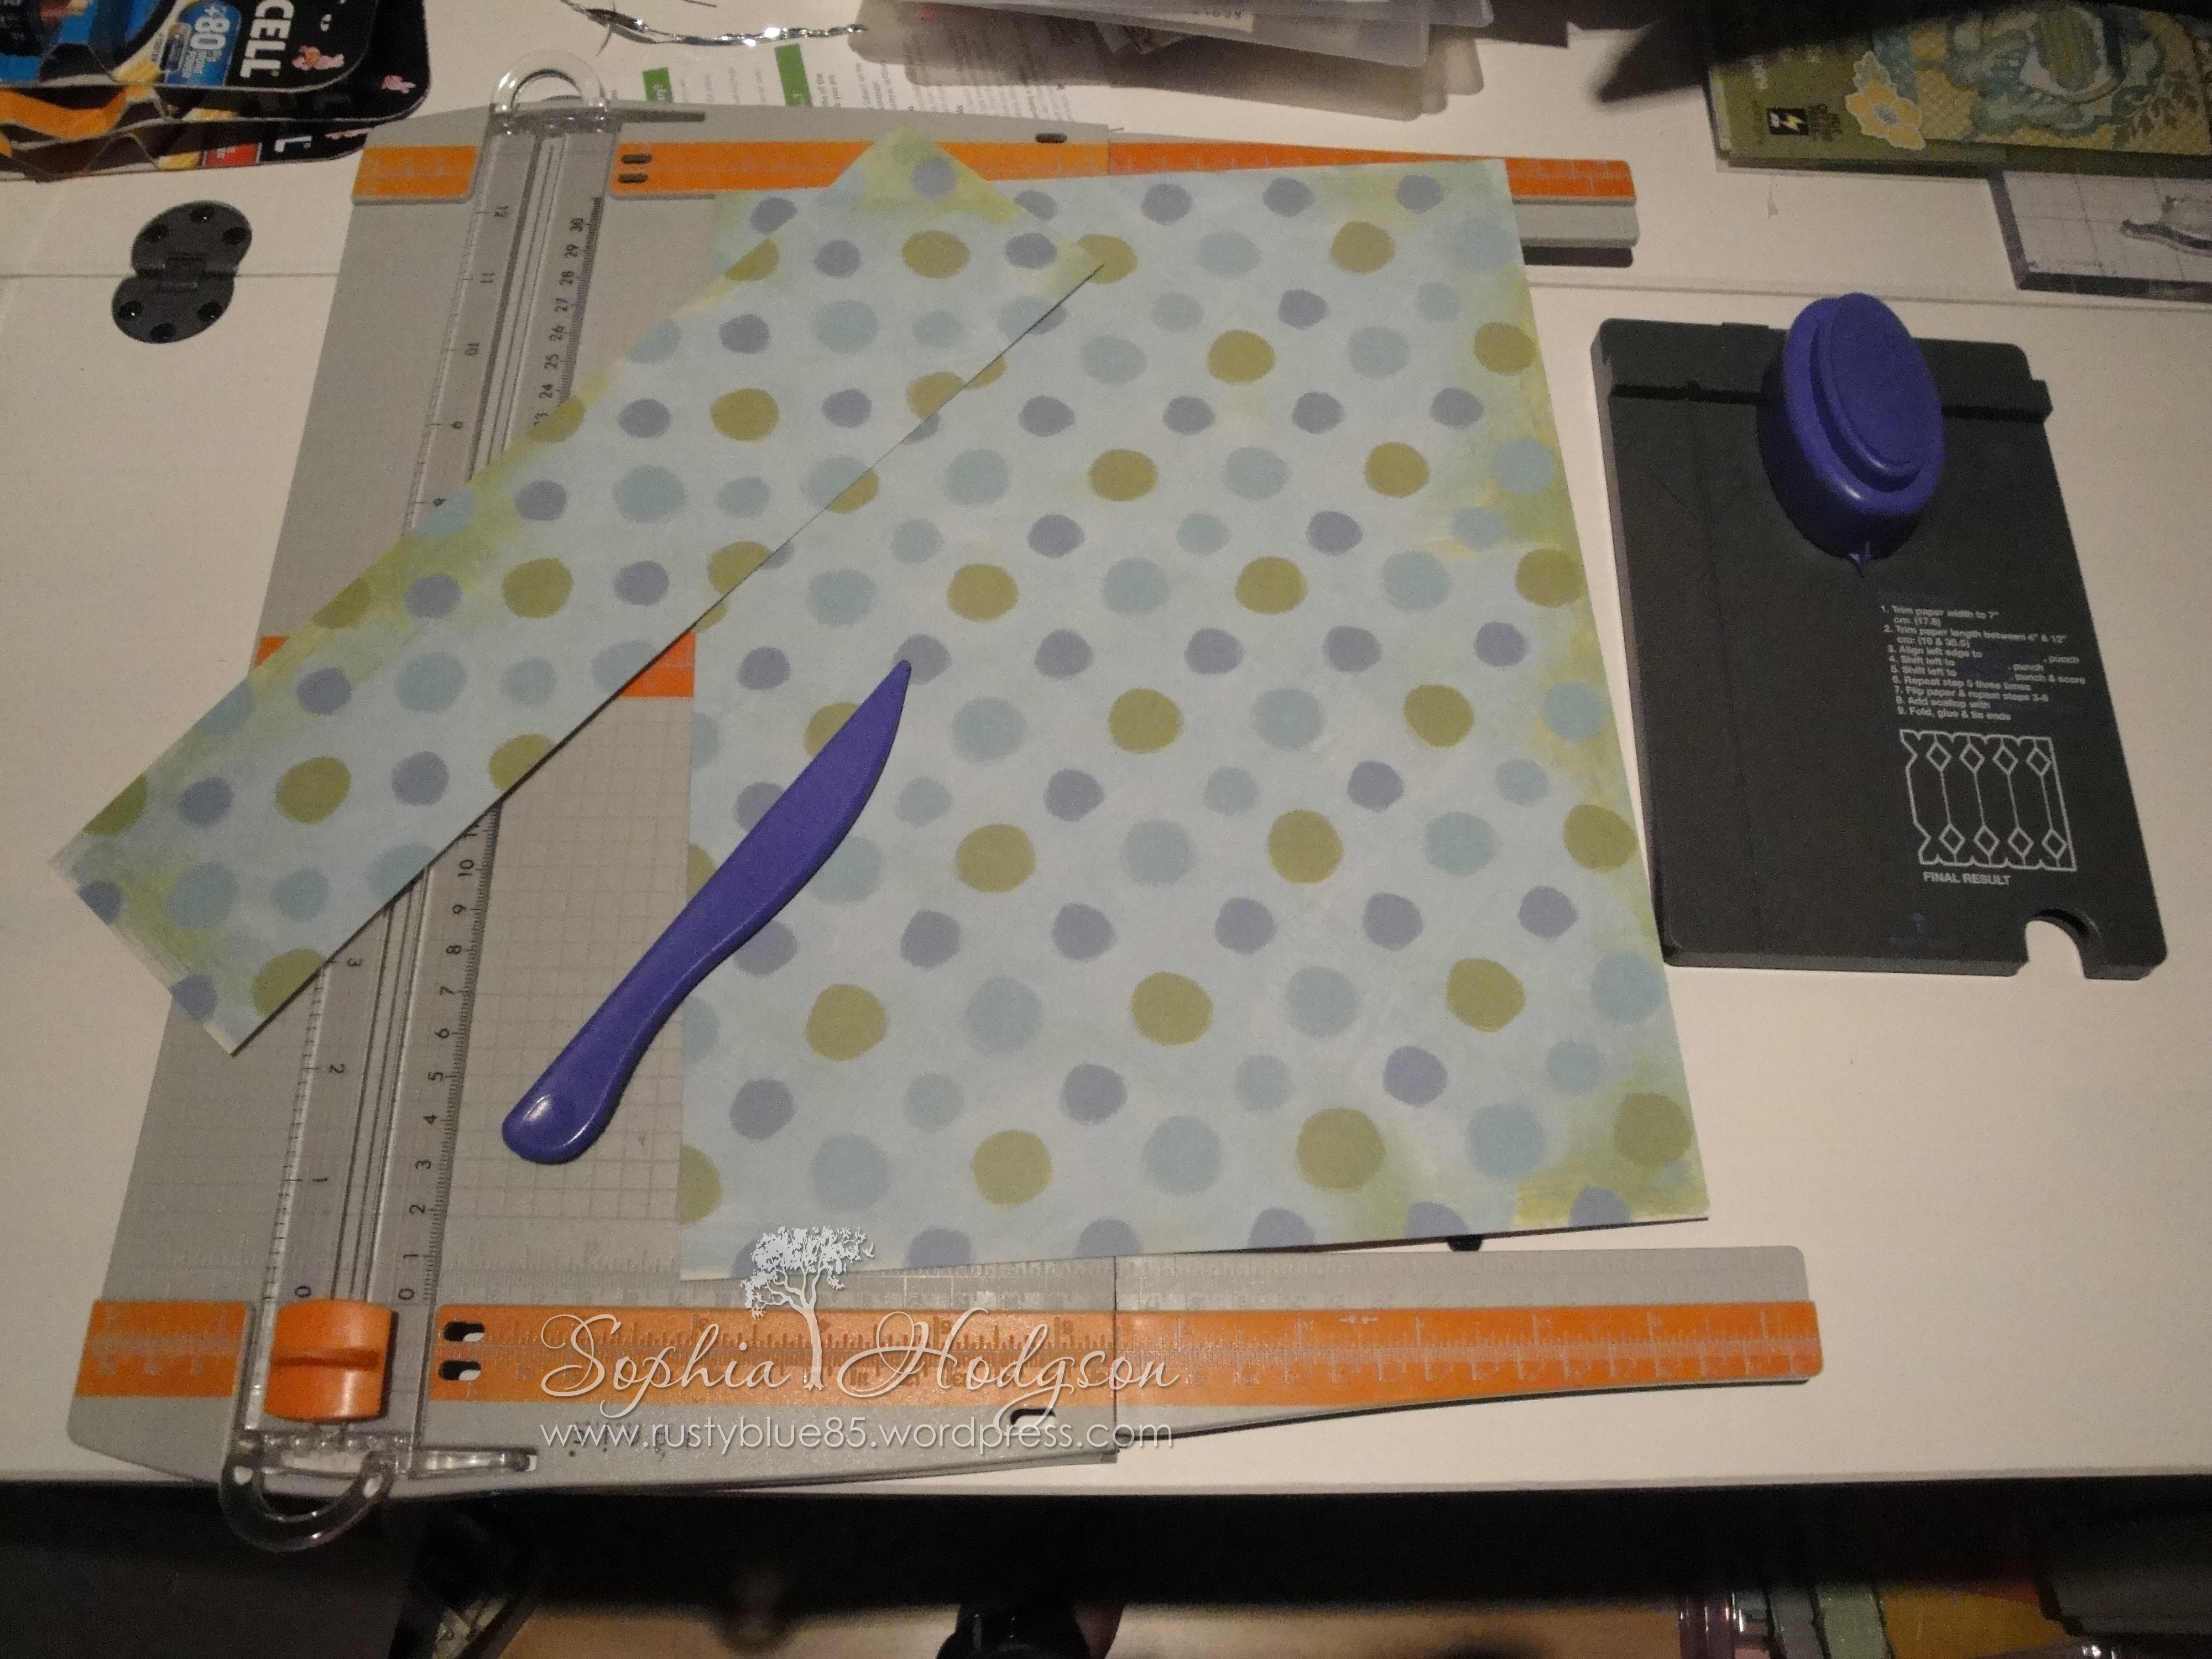
Next, using the We R Memory Keepers ‘Candy Punch Board’ (or as I call it ‘The Purple One’) line up the paper so the 11 inch side is against the guide lip & the 9 inch side is lined up on the purple ‘start line’. Punch, then move the paper along so the punched shape is over the top of the ‘diamond’ raised area, then punch again. Repeat, but this time a full diamond will be over the diamond raised area – score down the score line. Repeat until you have 6 whole ‘sides’ and the seventh half side (Picture C).
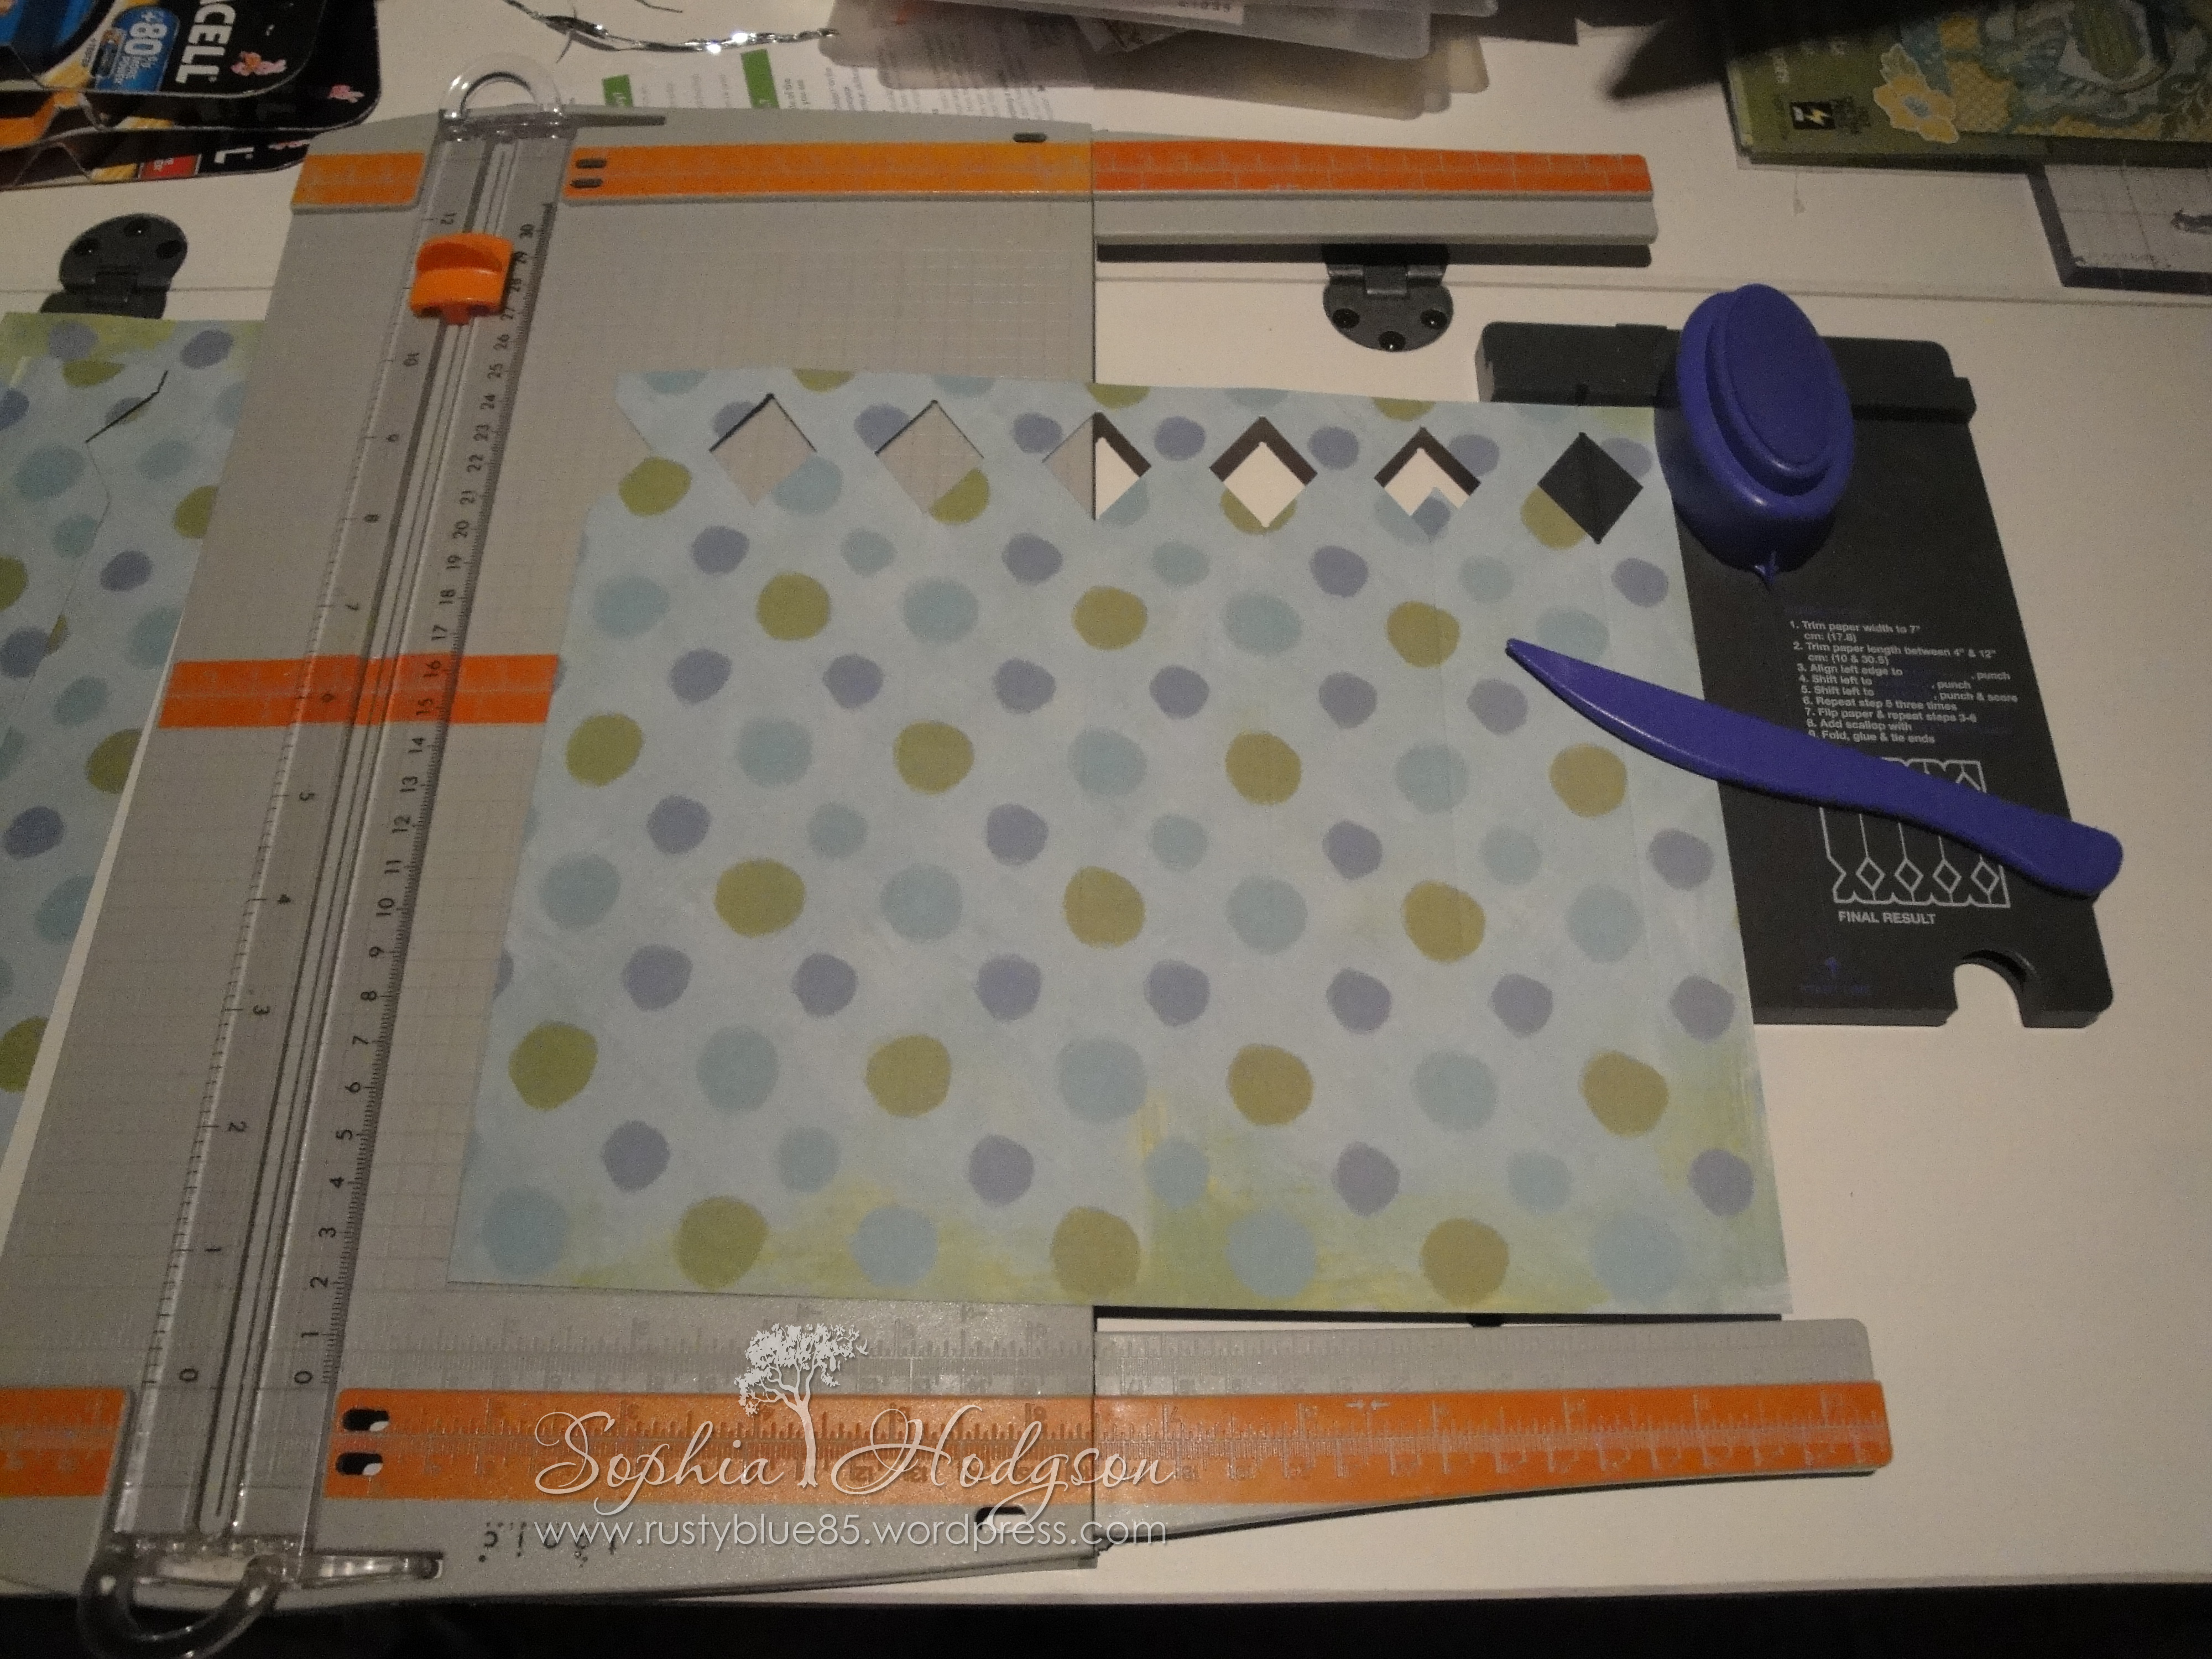
Fold over the sides so the score lines go all the way down the 9 inch side, score all along the paper 5 cm up from the edge opposite where all the diamonds are, then cut up 5 cm along the scored lines back towards the diamond cut outs. On the seventh half section, cut off the bottom 5 cm section of this side (Picture D).

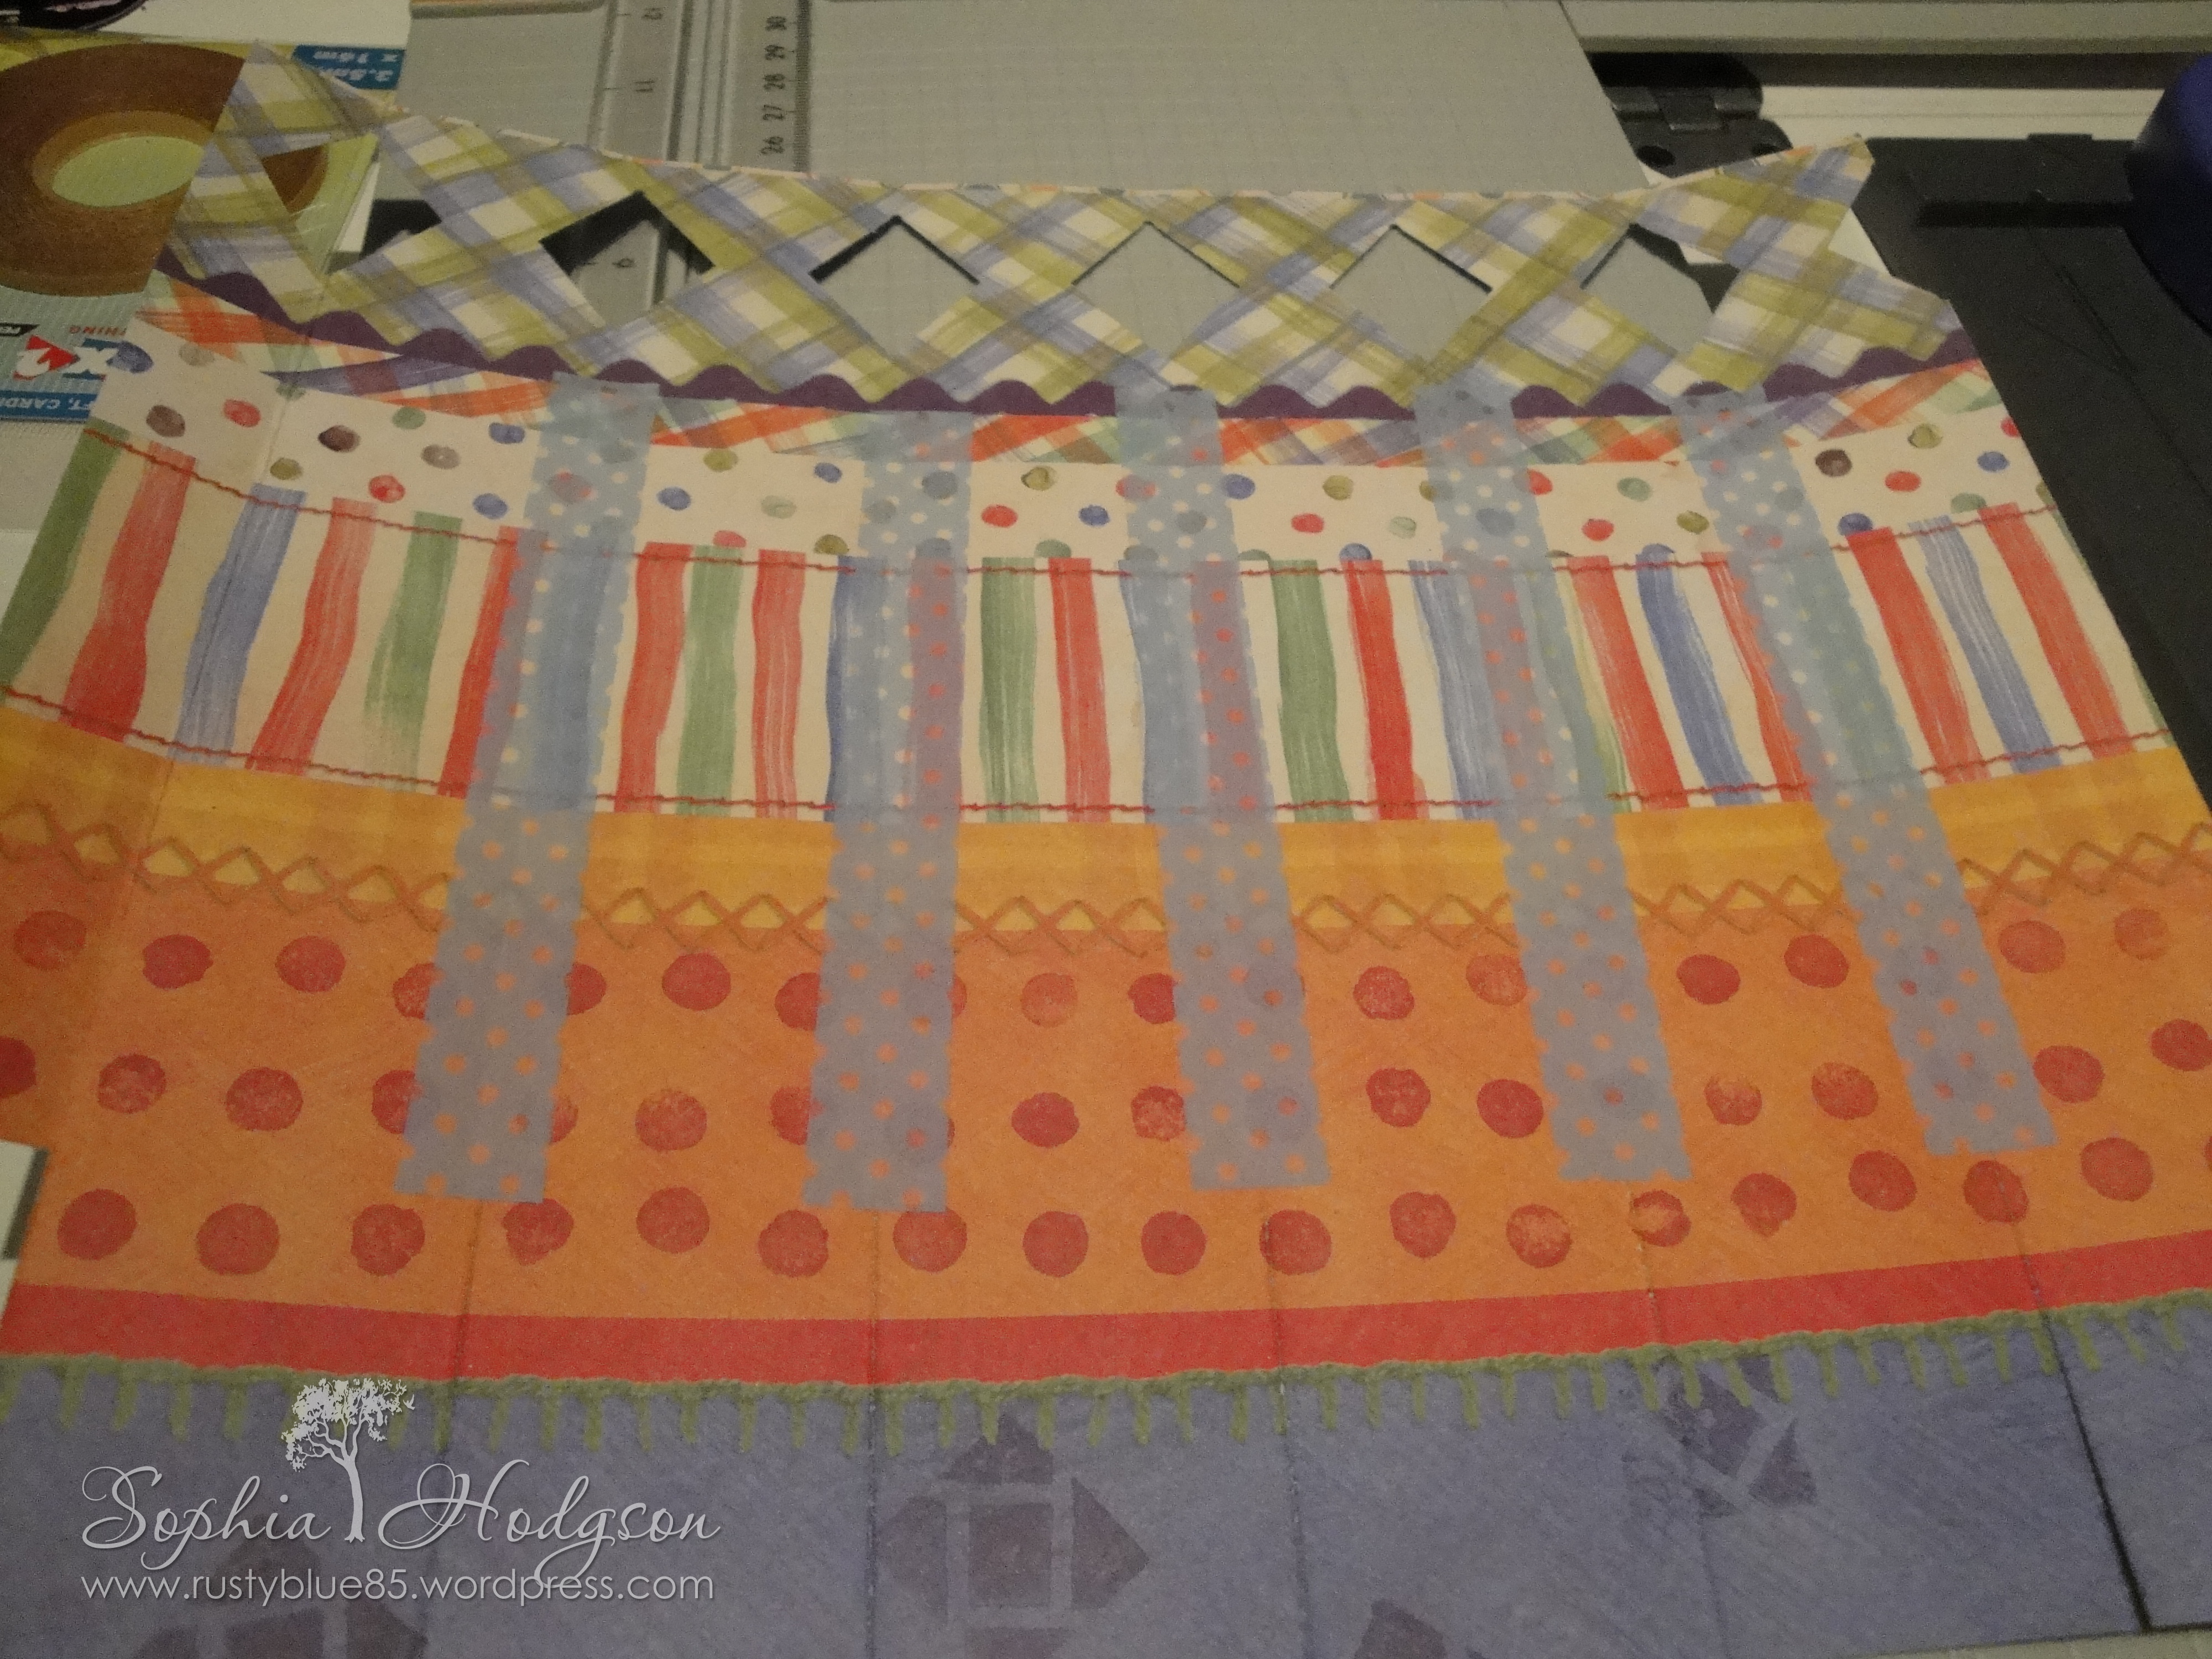
You may not feel the need to do this, but I like to put some Washi tape along the score lines that will be the corners of the box on the inside to just give it a bit more strength (Picture E).
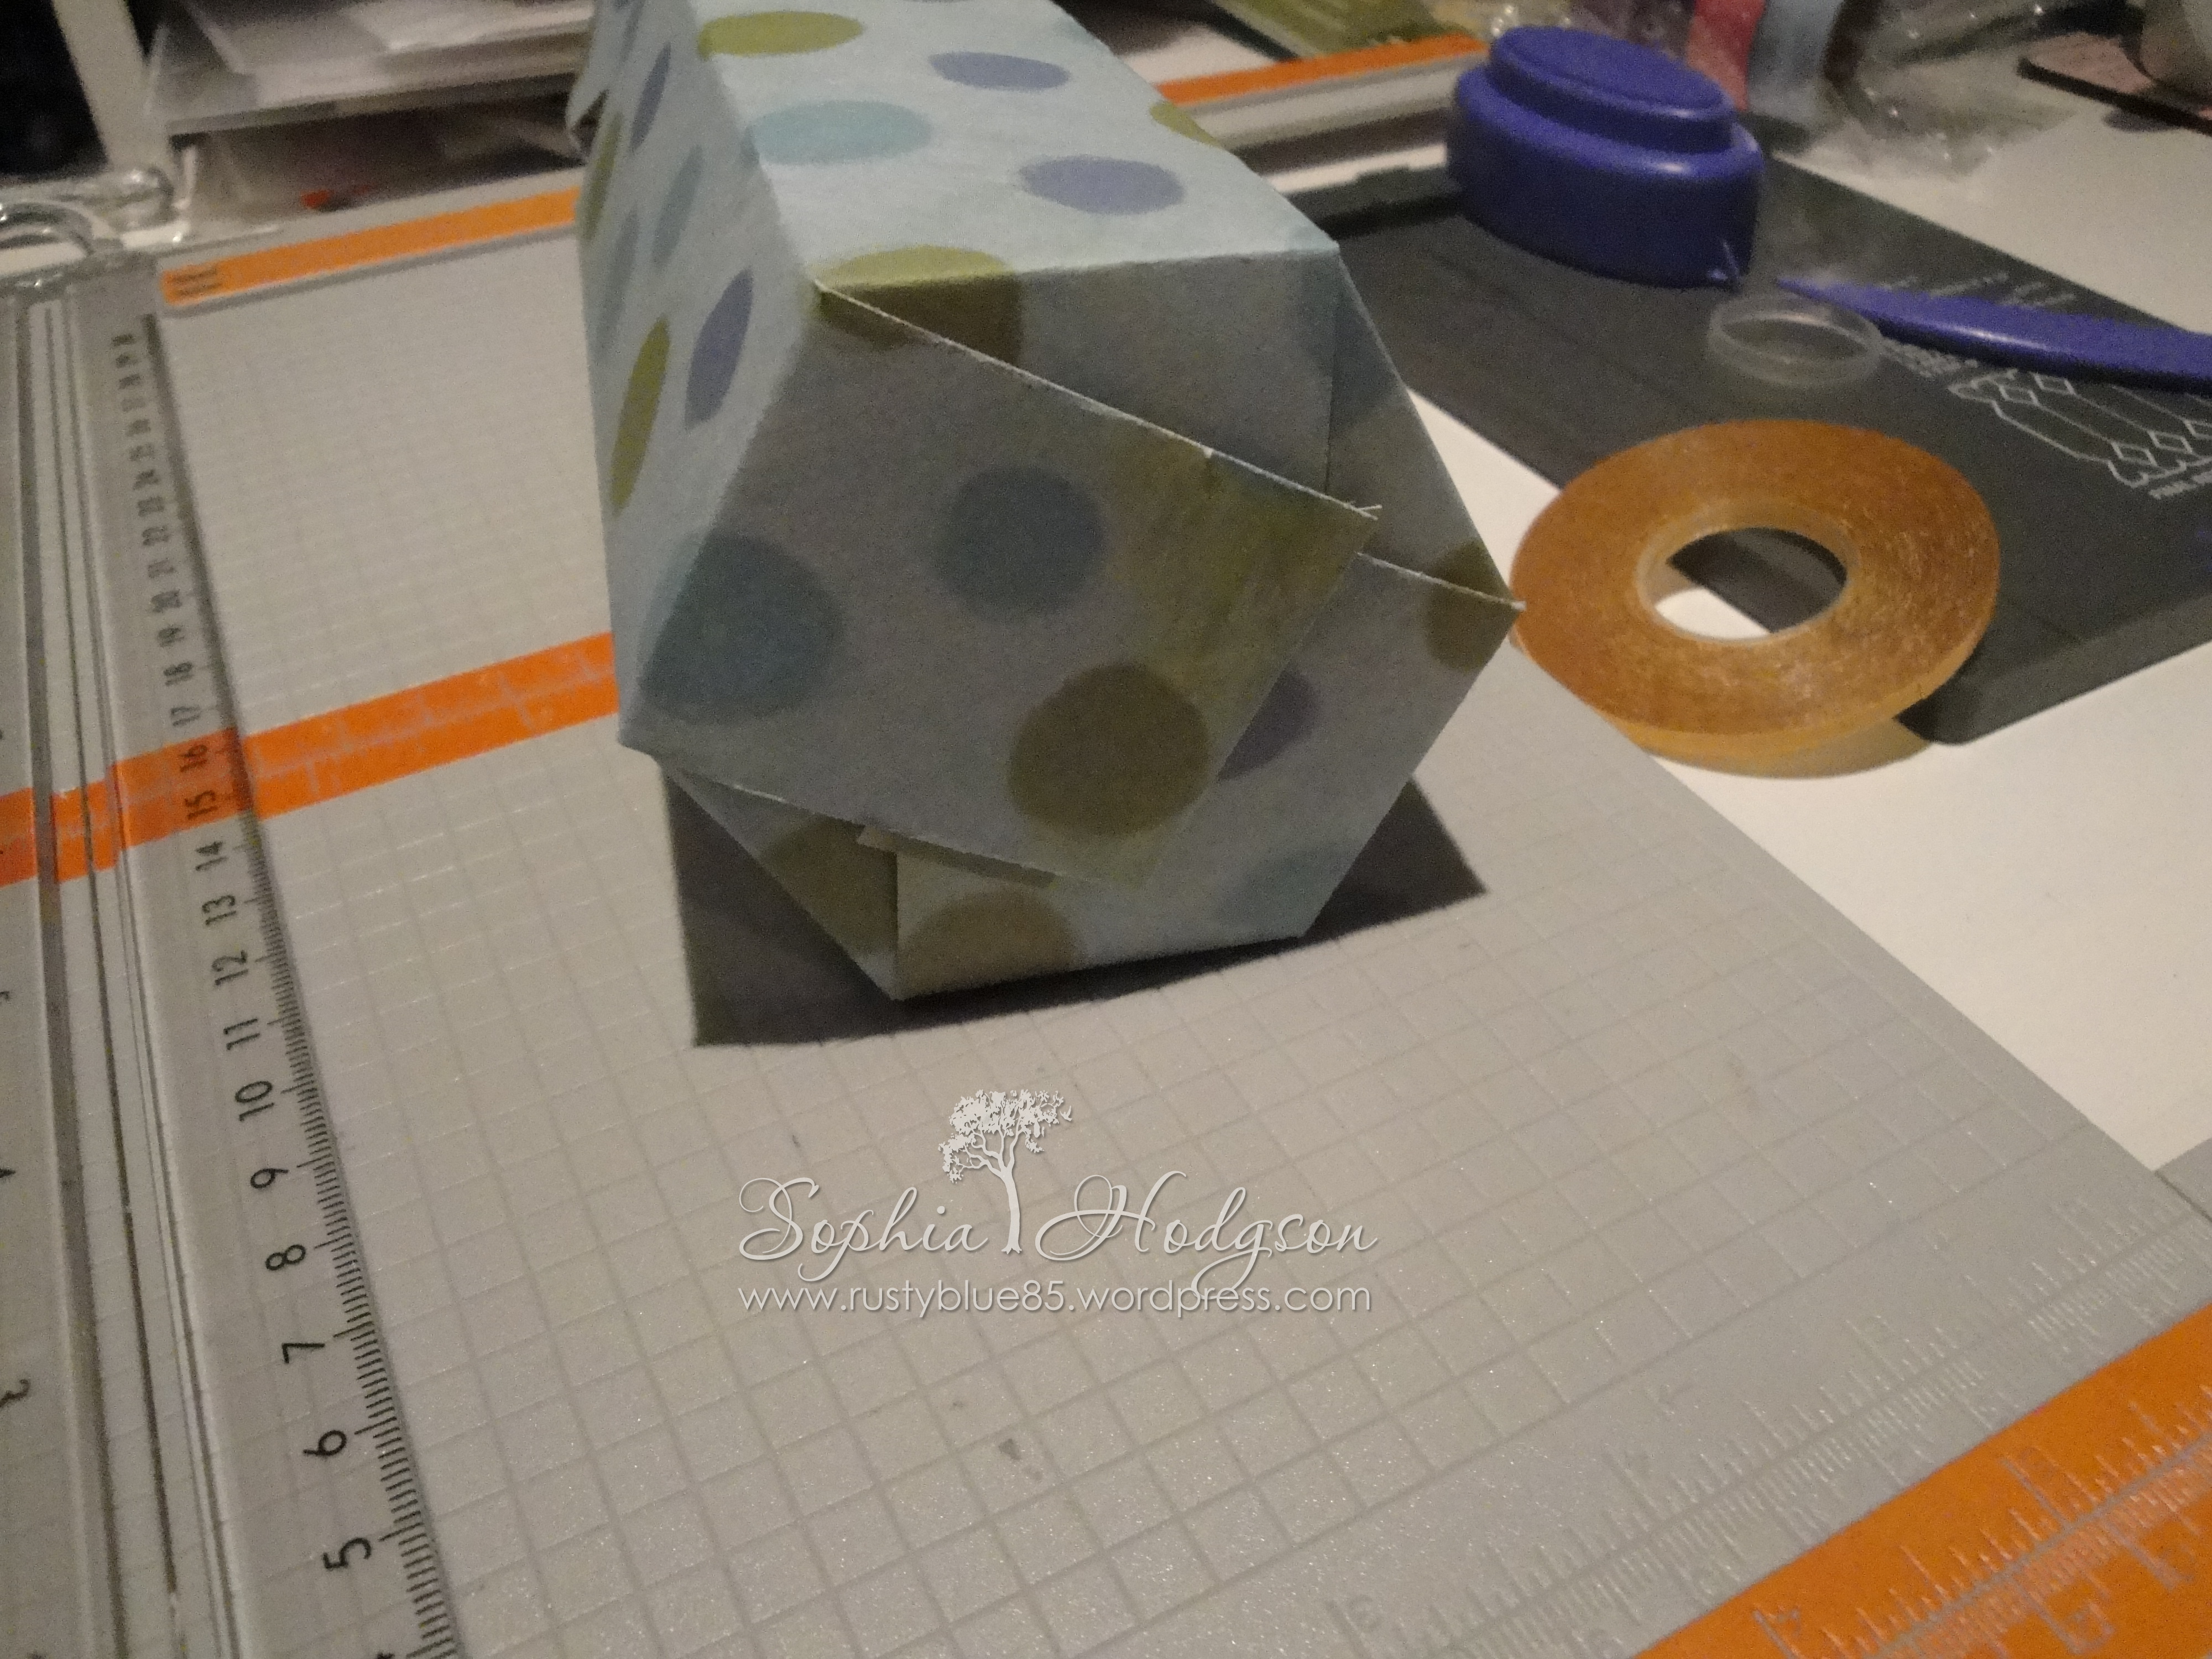
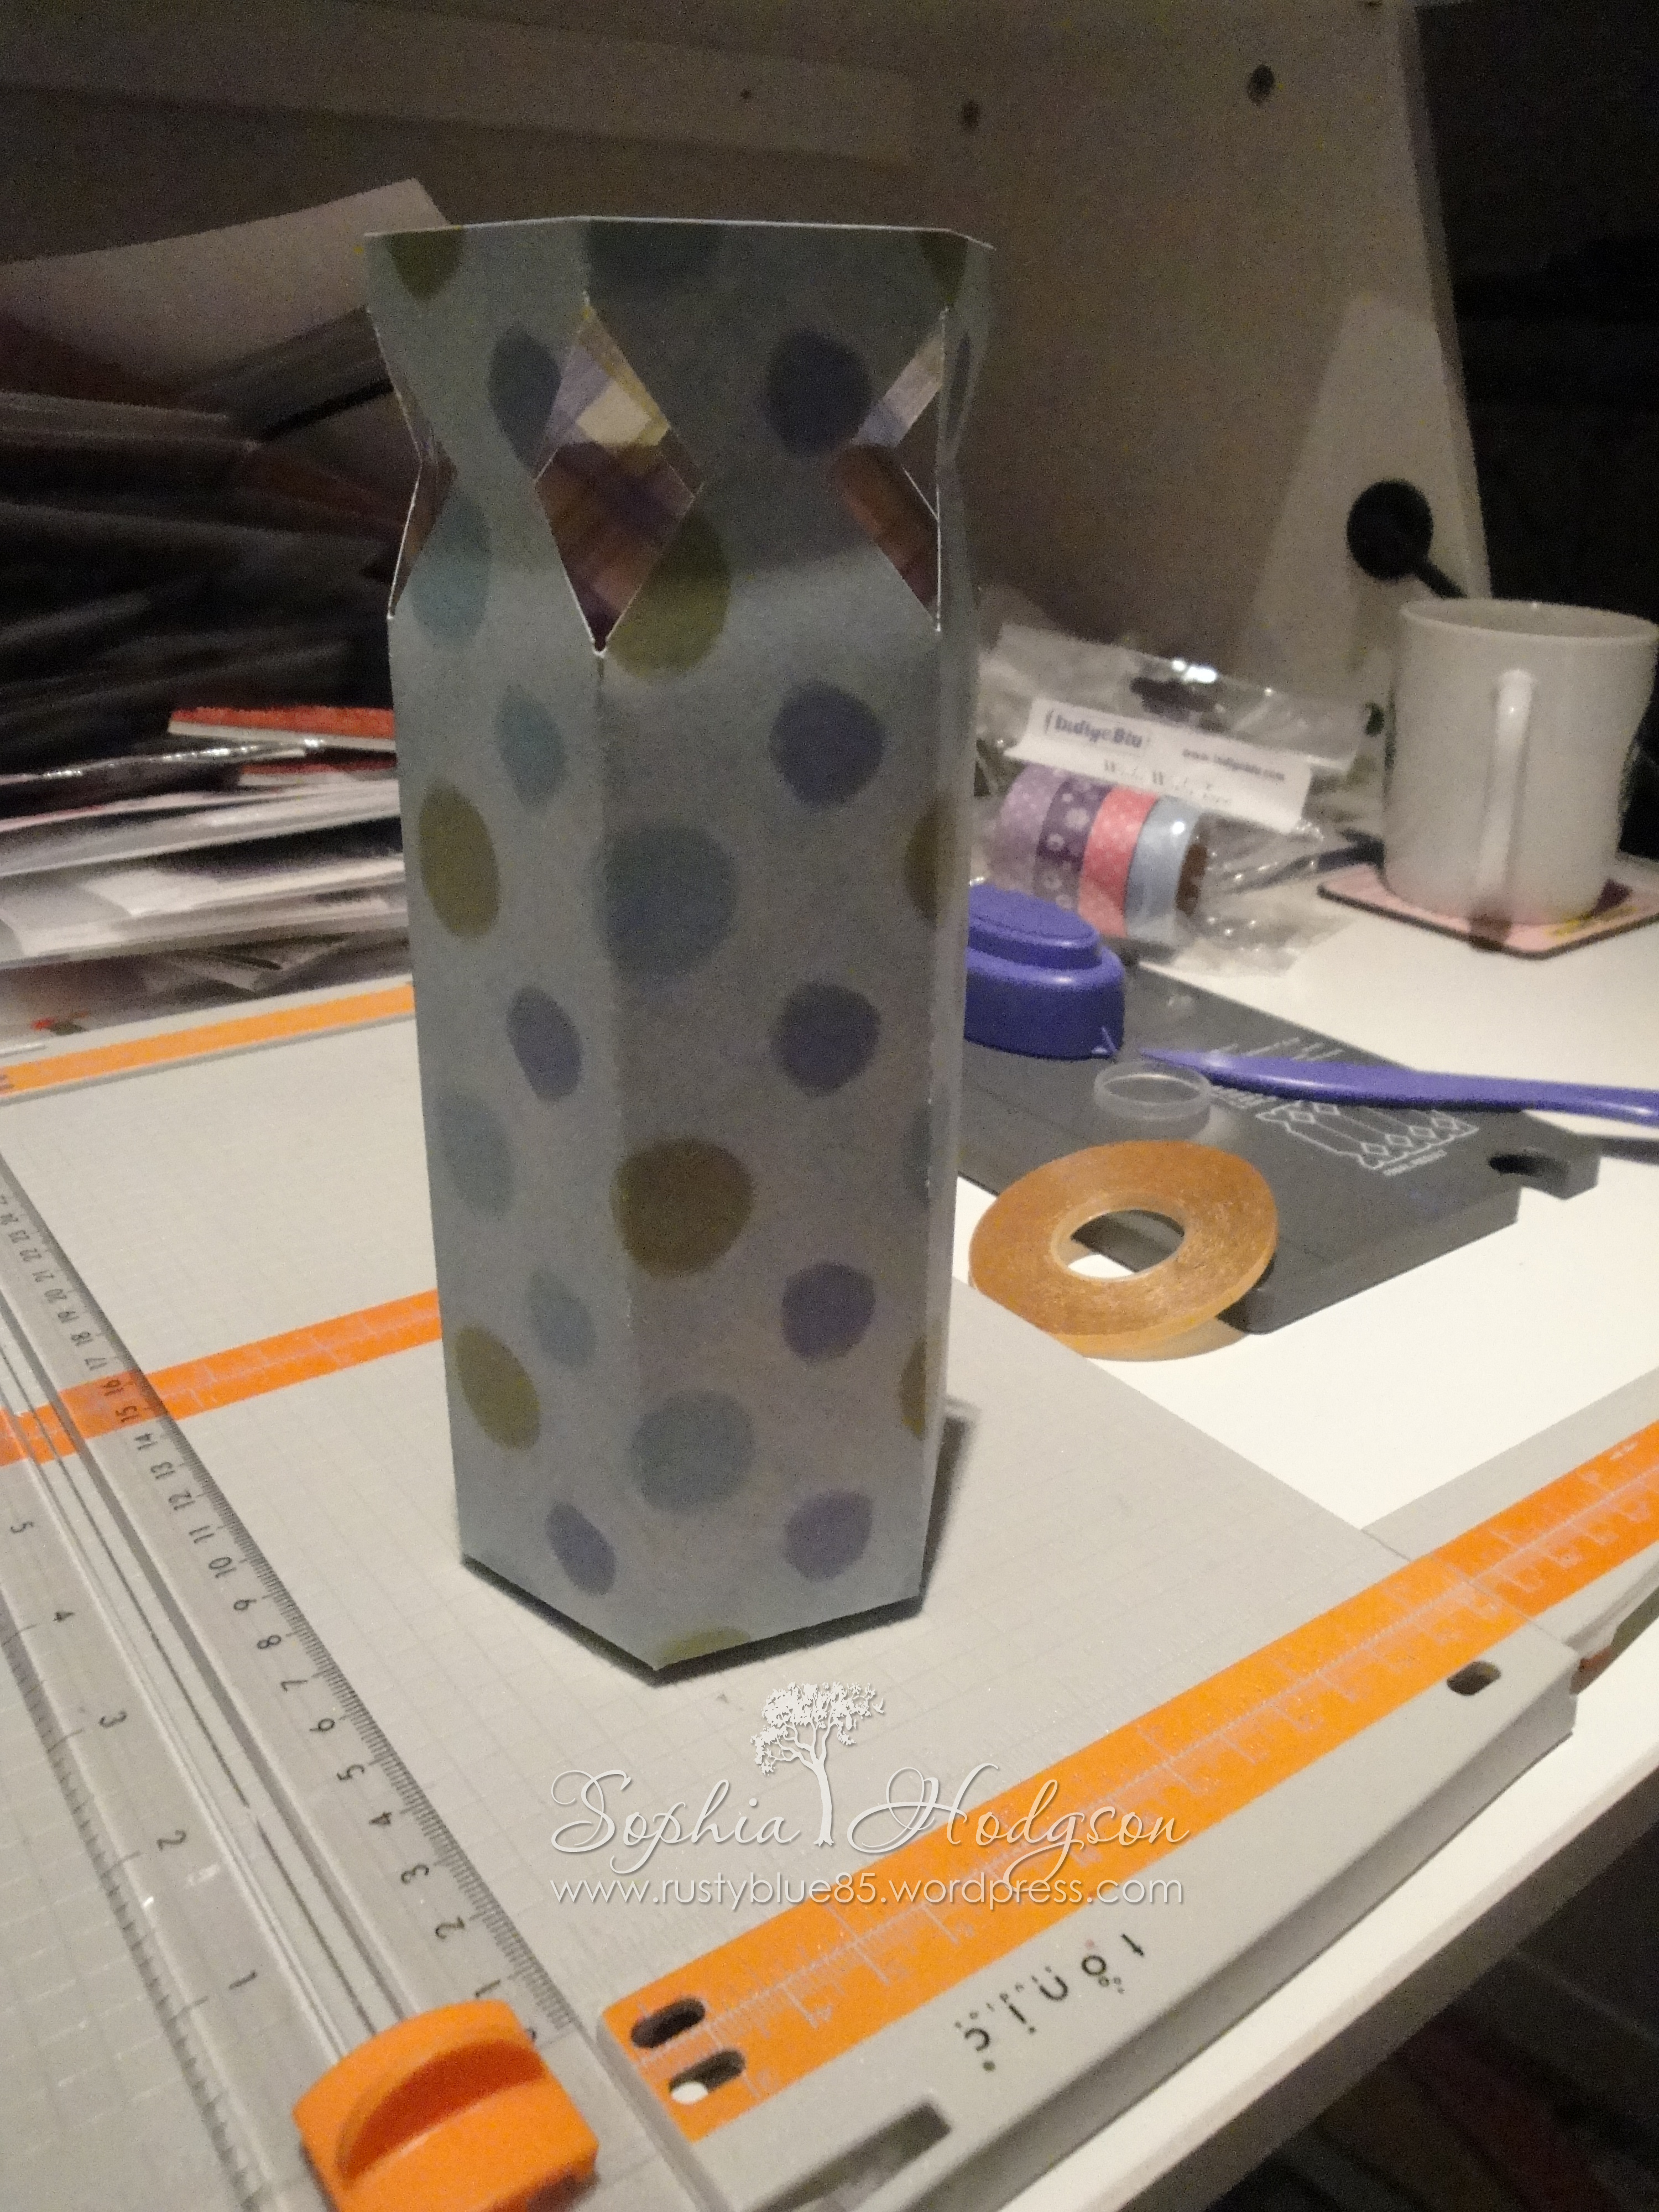
Using your choice of adhesive attach the half section underneath the full section at the other end of the paper creating a six-sided paper tube (Picture F). Take a bit of time to work out which flaps of the bottom section will be inside and which will be facing out so you don’t get glue on a section that will be on the base. Put the tube upside down so the diamonds are closest to your table & the flaps facing upwards & start carefully sticking them together. I have found that if the first two flaps meet perfectly edge over edge the ridgidity of the box is good, but the further flaps don’t meet up exactly (Picture G).

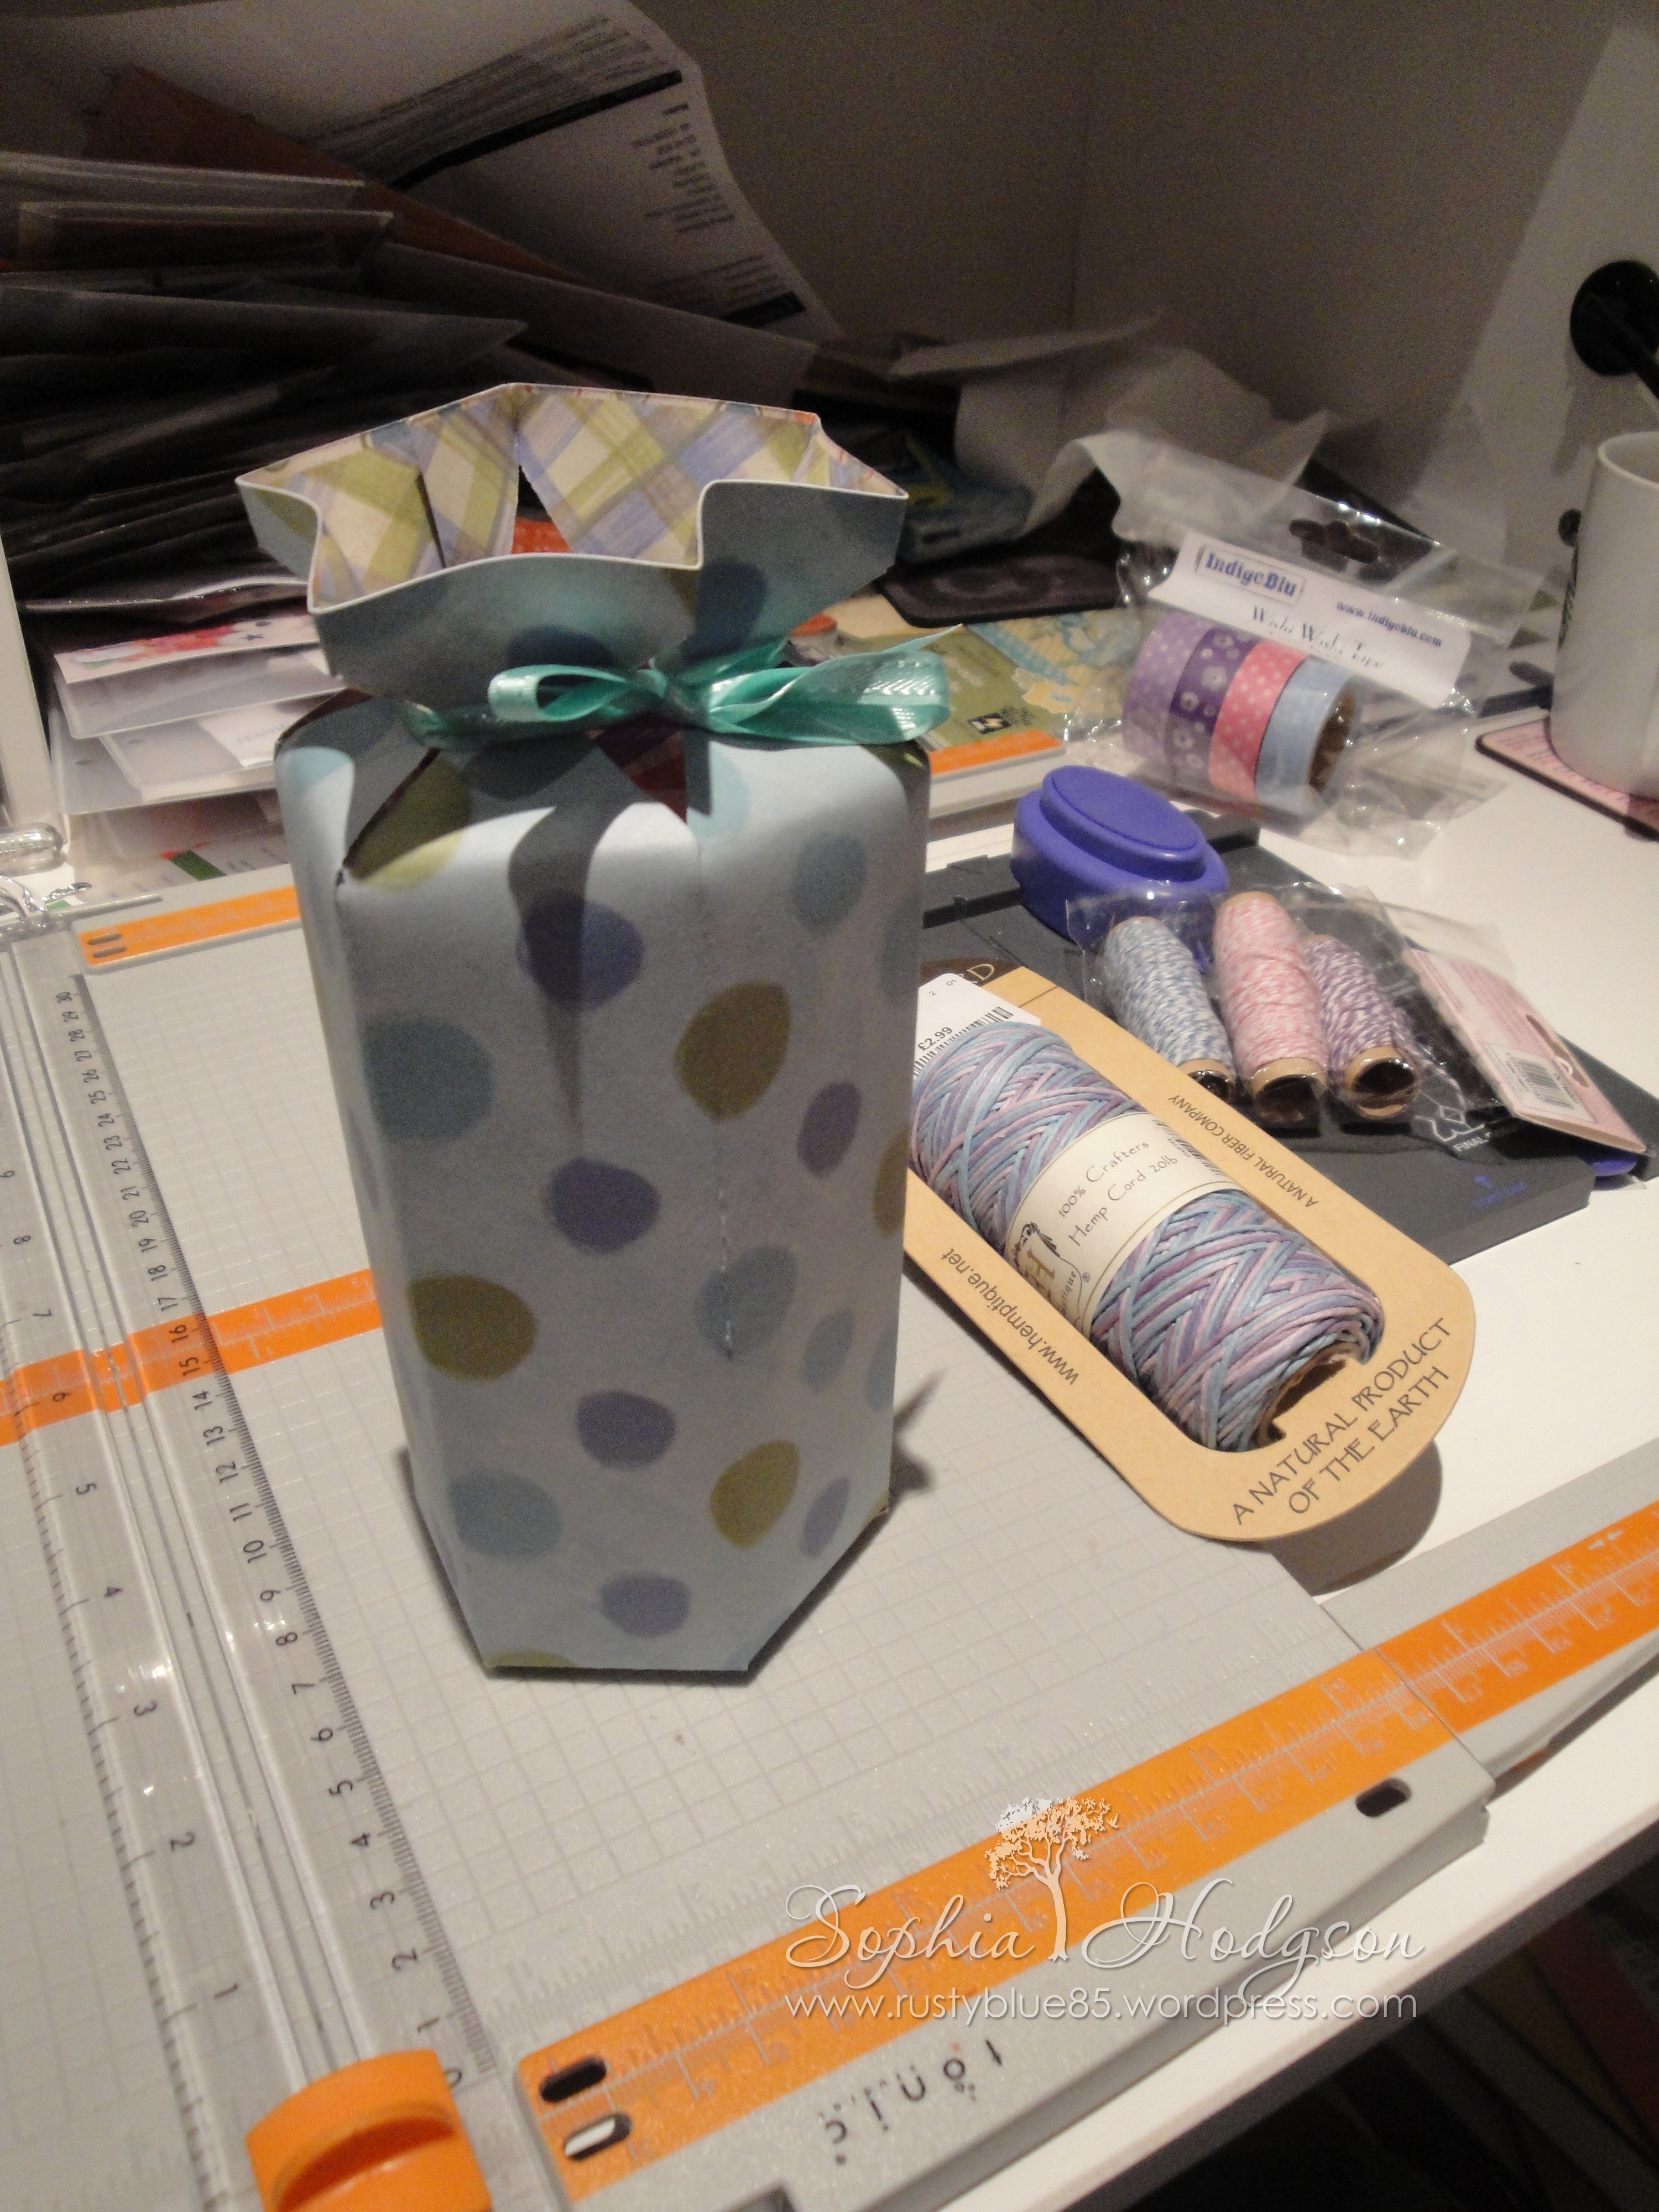
Now turn the treat box up the right way & gently fold the diamond cut outs so they pinch in as a ‘waist’ (a vey odd hourglass shaped lady I’m sure!; Picture H). Add whatever treats you want, then use ribbon to fasten the ‘waist’ shut (Picture I).
I hope that made sense! Enjoy the coming weekend & watch out for all this horrid weather that’s being forcast for the UK!

